Table of Contents
- Release Notes Portal Version 3.32.0 (available from November 10th 2026 on)
- Improvements for all FACT24 Editions
- Request password protection for files
- Create a vCard and share it with recipients
- Confirm the alarm before you trigger it with a telephone Quickstart
- View selected filter criteria in a filter-based group
- Set up automated archiving
- Notify persons in batches until the alarm goal is reached
- See predefined persons and groups when triggering an alarm
Portal Version 3.32

- Release Notes Portal Version 3.32.0 (available from November 10th 2026 on)
- Improvements for all FACT24 Editions
- Request password protection for files
- Create a vCard and share it with recipients
- Confirm the alarm before you trigger it with a telephone Quickstart
- View selected filter criteria in a filter-based group
- Set up automated archiving
- Notify persons in batches until the alarm goal is reached
- See predefined persons and groups when triggering an alarm
Release Notes Portal Version 3.32.0 (available from November 10th 2026 on)
Improvements for all FACT24 Editions
Request password protection for files
You can share files stored in FACT24 ENS+ through a link, for example with an alarm notification.
By default, anyone who has the link can open the file without a FACT24 login. This lets alarm recipients open documents quickly and reliably.
If you store confidential documents in FACT24 ENS+, you can have password protection turned on.
Anyone who opens a file link must then log in in FACT24 before they can see the file. The link on its own, for example in a forwarded email, no longer opens the document.
You can find more information about attachments here
Create a vCard and share it with recipients
People often don't answer calls from unknown numbers. A vCard is a contact card with one contact name and one or more of your caller IDs.
You create it in the portal and send it to recipients through an alarm.
Recipients who save it see that name when an alarm call comes from any of these numbers.
They can recognize the call and answer it, or call back if they missed it.
Create the vCard
- Go to Setup > Caller IDs in the FACT24 ENS+ postal.
- On the Overview tab, select Create vCard.
- In Contact Name, enter the name recipients will see when you call them. Use a name they will recognize and trust.
- Select the Organizational unit and set Global.
These settings decide which users can see the vCard file in the file manager: users of the selected unit, or everyone if Global is on. - Under Phone numbers, select a number. The list contains your custom caller IDs and the caller IDs provided by FACT24.
- To add another number, select the plus symbol.
- To remove a number, select the minus symbol next to it.
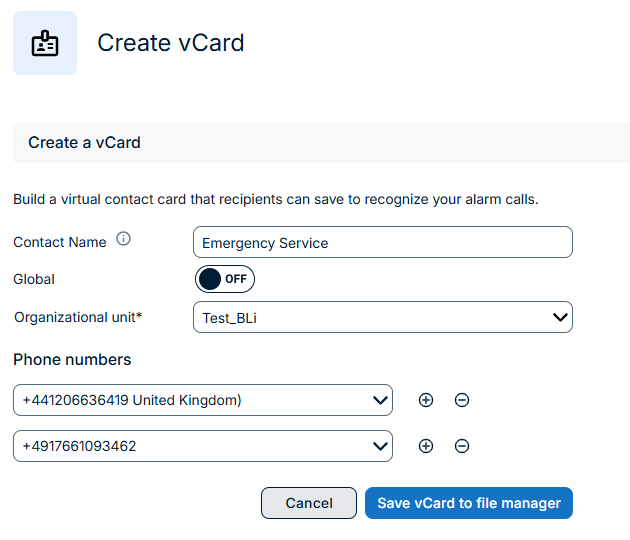
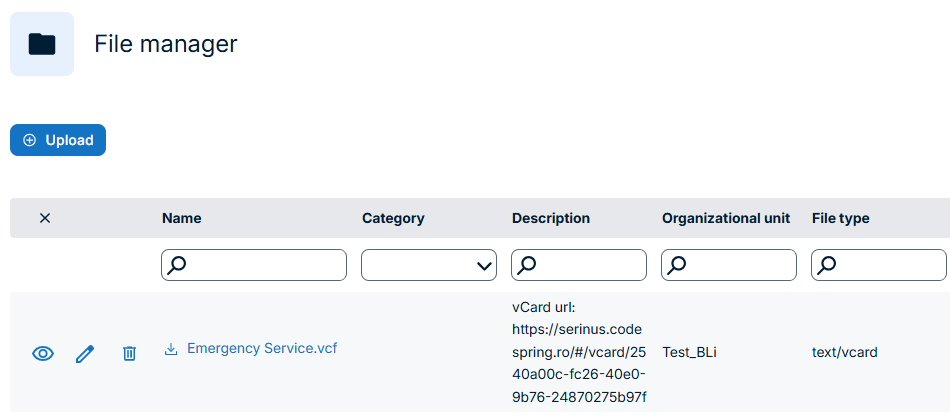
- Select Save vCard to file manager. A new vCard file is added to the file manager.
Share the vCard
- On the Create vCard page, select the copy button to copy the suggested alarm message. It contains the vCard's unique link.
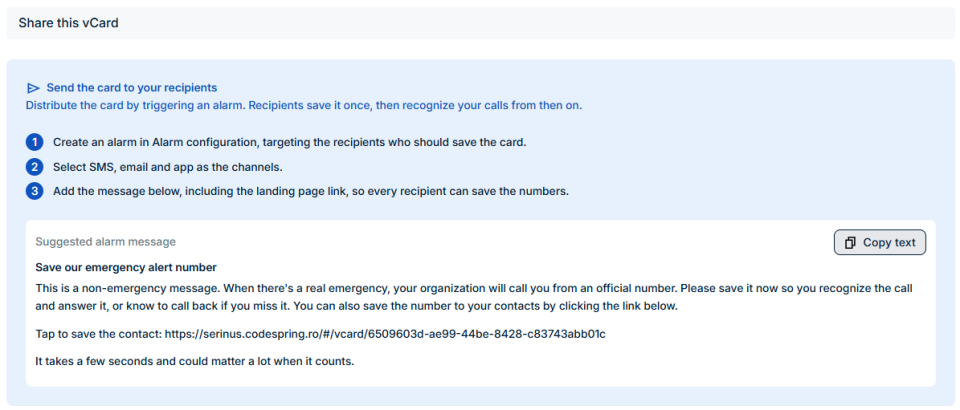
- Create an alarm that targets the recipients who should save the vCard.
- Select the notification channels: SMS, email, app, or any combination.
- Add the vCard to the alarm in one of these ways:
- Paste the suggested message into the alarm message and adjust it to your needs.
- or for email and app only: attach the vCard file from the file manager.
- Trigger the alarm.
Recipients receive the alarm with the link or the vCard file:
Link:
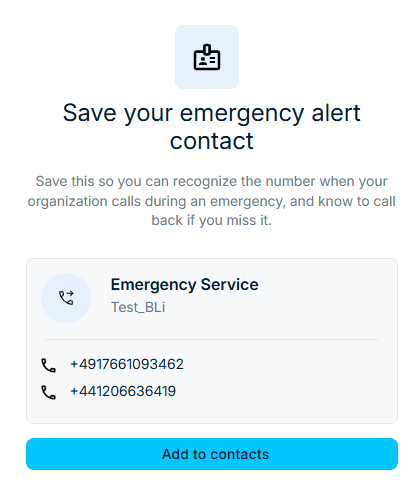
The link opens a page with the contact name and the phone numbers. Recipients select Add to contacts.
Email attachment:
Recipients open the .vcf file on their phone and save the contact.
The saved contact contains the contact name and all phone numbers. This works on iOS and Android.
You can't edit a saved vCard. To change the name or numbers, create a new vCard and share it again.
You can also copy the vCard's link from the description of its file in the file manager.
In some countries, SMS messages that contain links are blocked.
Attachments work for email and app messages only and it depends how your enterprise is configured.
You can find more information about Caller IDs here
Confirm the alarm before you trigger it with a telephone Quickstart
When you trigger an alarm with a telephone Quickstart, the system tells you which alarm your DTMF input or alarm number will start, then waits for you to confirm.
This helps you catch input errors and avoid triggering the wrong alarm.
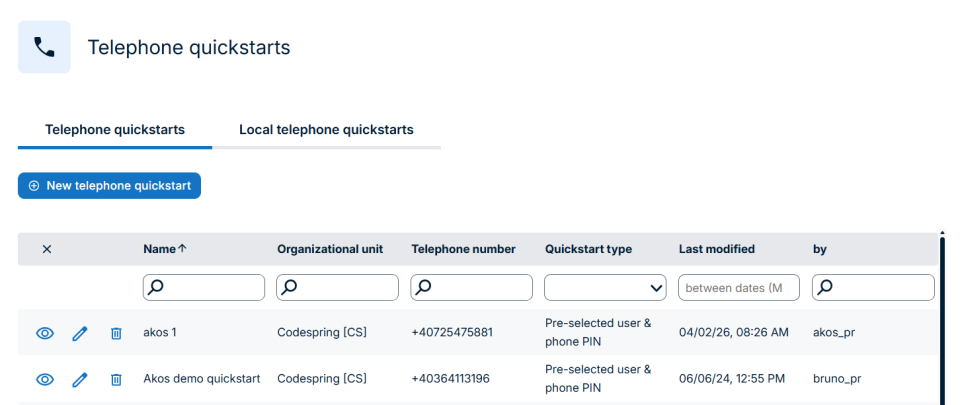
Before you start
- The telephone Quickstart is set up as Pre-configured list or List all alarms.
- You know which input starts the alarm you need:
- Pre-configured list: the DTMF input assigned to the alarm.
- List all alarms: the alarm number.
Steps
- Call the activation number (you can find it in the product among the system phone numbers) from your registered phone.
- If the system asks for them, enter your user phone ID and your phone PIN. What it asks for depends on how your telephone Quickstart is set up.
- Enter the DTMF input or alarm number for the alarm you want to start.
- Listen to the announcement. The system names the alarm that matches your input.
- Check the alarm name:
- If it is correct: press the announced key to start the alarm.
- If it is wrong: press 5 so you can reenter the DTMF code.
If your input does not match any alarm, the system tells you and asks you to enter it again. No alarm starts.
The alarm starts only after you confirm it. You then hear the message that the alarm has started.
You can find more information about telephone quickstarts here
View selected filter criteria in a filter-based group
When the User configures a filter-based group in the FACT24 ENS+, they can see which elements were selected in each filter right on the filter card. The User no longer needs to open the dropdown to check your selection.
Steps
- Go to Groups > Filter based groups.
- Open an existing group, or click Add group to create one.
- Scroll to Filter configuration.
- Click Add Filter and choose a filter with a dropdown, or open a filter that is already configured. These filters are:
- Groups
- Language
- Profile
- Organizational unit
- Qualification
- Primary Qualification
- Assigned address
- Select one or more elements in the dropdown.
- Hover over the filter to see the full names of all selected elements.
- Click Save to save the group.
The selected elements appear as pills on the filter card. If an element name is too long, it is shortened with “…”.
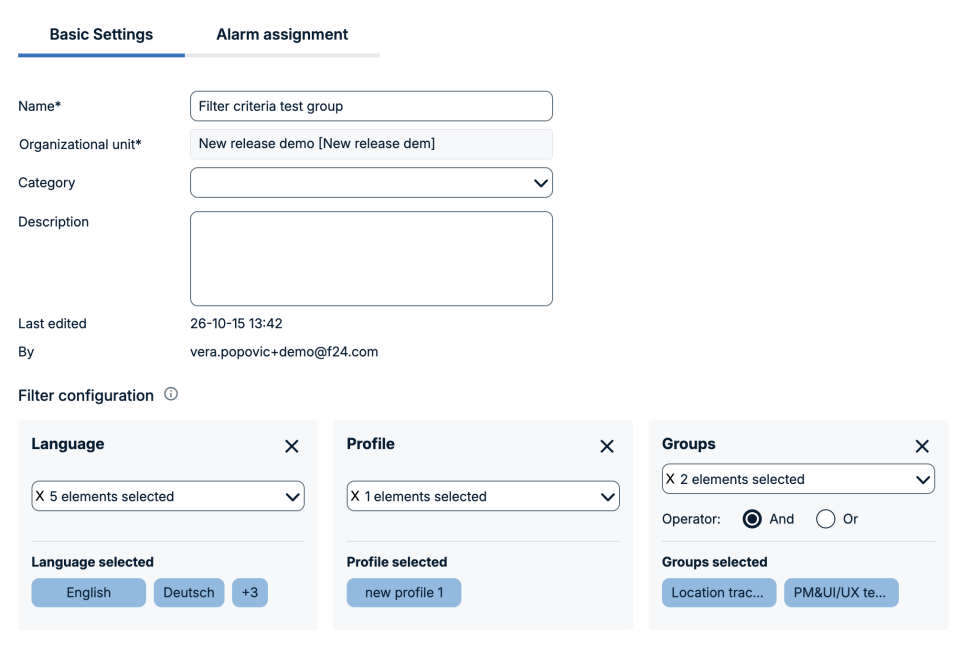
You can find more information about filter based groups here
Set up automated archiving
FACT24 ENS+ gives now the possibility to create an archive of selected account data as a ZIP file.
This gives Users a copy of their own data on a fixed schedule, available to download in the Download Center.
Steps
- Go to the Setup >Your account.
- Open the Automated archiving tab.
- In the dropdown, select the data you want to archive. You can select one or more of these:
- Persons
- Groups
- Users
- Calendar
- Alarms
- Surveys
- Addresses
- Under cadence, select Daily, Weekly or Monthly.
- Switch on the Enable automated archiving toggle. You can only switch on the toggle.
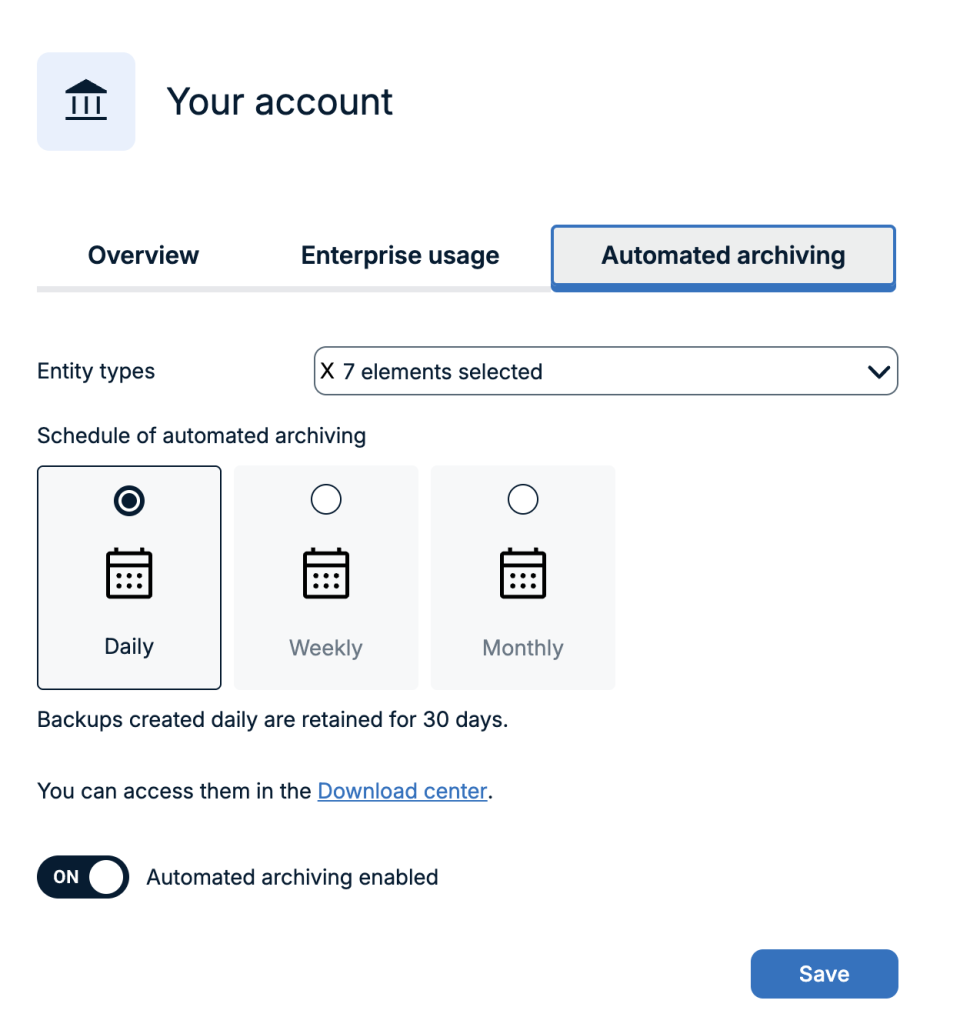
The portal creates a ZIP file with the selected data on the selected schedule. You can download the files from the Download Center.
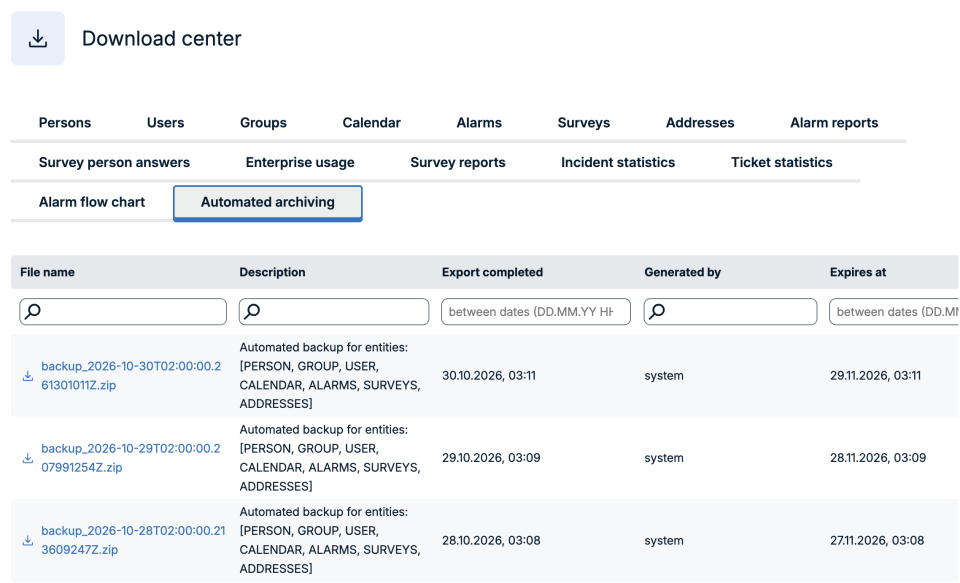
The alarm data in the archive is not the full alarm configuration. Check the exported alarm data to see what is included.
If the toggle is switched off, no archiving takes place, even if data and cadence are selected.
Each generated file will have an expiry date and it will be automatically deleted after the expiry date:
- for daily backups, expiry date is: 30 days
- for weekly backups, expiry date is 180 days
- for monthly backups, expiry date is 720 days
You can find more information about your account here
Notify persons in batches until the alarm goal is reached
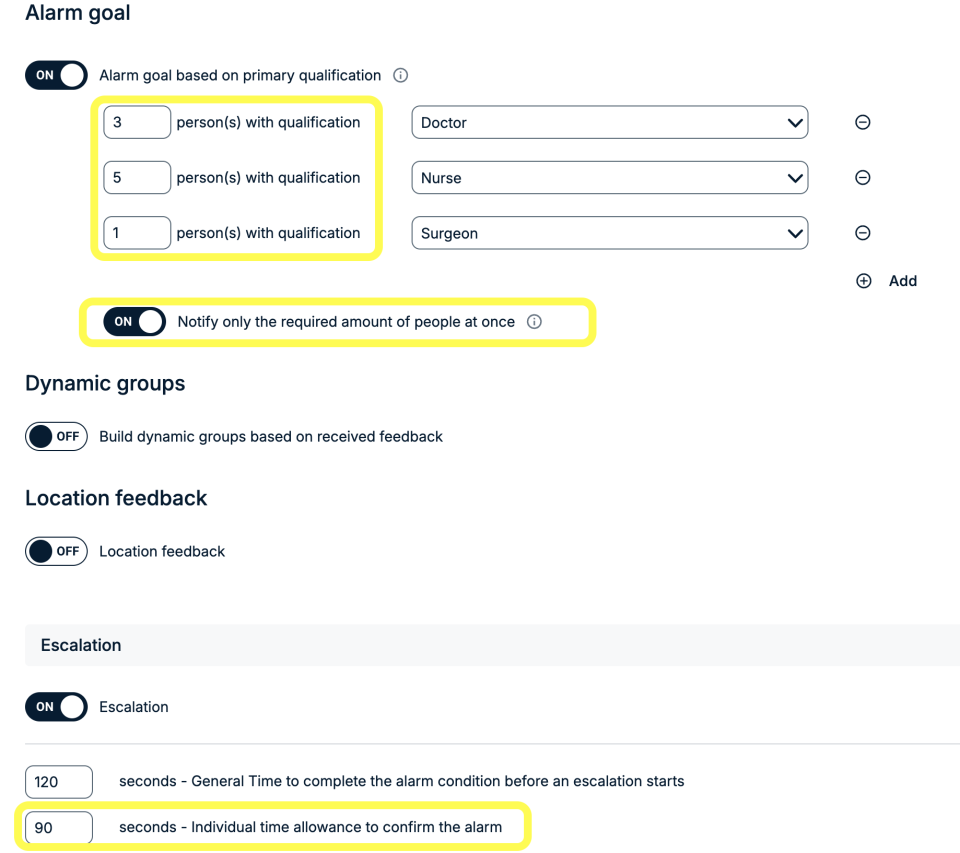
You can set an alarm to notify qualified persons in small, random batches within a group instead of the whole group at once. The alarm stops notifying once your qualification-based alarm goal is reached. This helps you avoid notifying more persons than you need.
Before you start
The alarm must use:
- the Parallel alarm type
- feedback (confirmation)
- a Qualification-based alarm goal
Steps
- Open the alarm you want to configure.
- In Audience & Channels, set the alarm type to Parallel.
- In Feedback & Escalation, switch on Confirmation.
- Under Alarm goal, select Qualification-based alarm goal. Then define how many persons with each primary qualification must confirm the alarm.
- Switch on Notify in batches. Enter the number of persons to notify in the first batch.
- Click Save.
When the alarm is triggered, ENS notifies a random batch of persons with the selected qualifications.
- If the alarm goal is not reached, ENS notifies another batch.
- Once the alarm goal is reached, no further persons are notified.
Notify in batches is only available for the Parallel alarm type. It does not work with a group-based alarm goal.
When Notify in batches is on, the time offset between persons set in groups is ignored.
You can find more information about alarm goals here
See predefined persons and groups when triggering an alarm
You can protect the persons and groups selected during alarm configuration from being removed when an alarm is triggered.
This ensures that the predefined audience is always notified, while still allowing you to add additional persons and groups when needed.
Before you start
- An alarm must have persons or groups assigned in Audience & Channels.
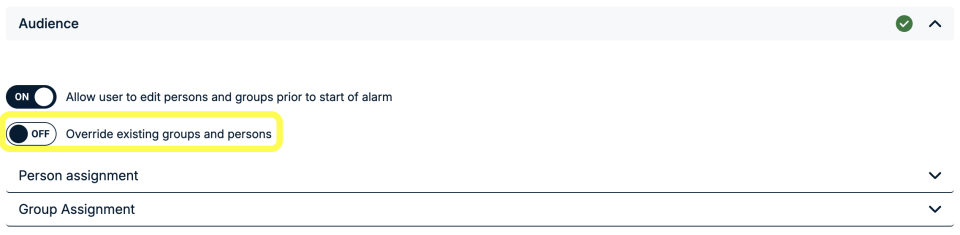
- Allow user to edit persons and groups prior to start of alarm must be switched on and Override existing groups and persons must be off.
Steps
- Open the alarm you want to configure.
- Go to Audience & Channels.
- Switch off Override existing groups and persons.
- Click Save.
When the alarm is triggered, the predefined persons and groups are displayed in gray and cannot be removed or edited.
- You can add additional persons and groups to the alarm audience.
- You can edit or remove any additional persons and groups you have added.
- Remove all only removes additionally selected persons and groups. The predefined audience remains unchanged.
- Both the predefined and additionally selected persons and groups are notified when the alarm starts.
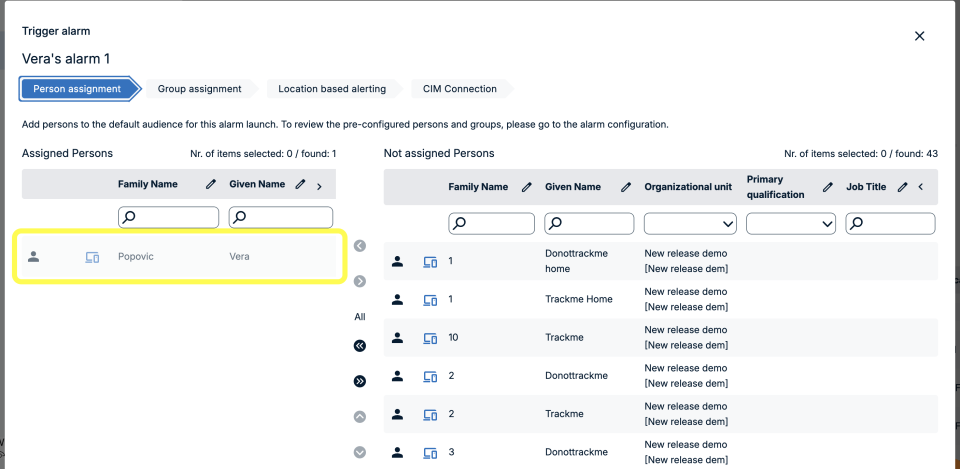
- You can still search for predefined persons and groups and view their details, but you cannot edit them.
- When Override existing groups and persons is switched on, you can modify the predefined audience before triggering the alarm, as before.
- When Allow user to edit persons and groups prior to start of alarm is switched off, the audience cannot be modified when triggering the alarm.
- These restrictions also apply to predefined persons and groups from other organizational scopes that are visible to the user.