FACT24 ENS+
Release Notes
Portal Version 3.29
Portal Version 3.28
Portal Version 3.27
Portal Version 3.26
Portal Version 3.25
Portal Version 3.24
Portal Version 3.23
Portal Version 3.22
Portal Version 3.21
Portal Version 3.20
Portal Version 3.19
Portal Version 3.18
Portal Version 3.17
Portal Version 3.16
Portal Version 3.15
Portal Version 3.14
Portal Version 3.13
Portal Version 3.12
Portal Version 3.11
Portal Version 3.10
Portal Version 3.9
Portal Version 3.8
Portal Version 3.7
Portal Version 3.6
Portal Version 3.5
Portal Version 3.4
Portal Version 3.3
Portal Version 3.0
Portal Version 3.2
Getting started
Setup
Managing ENS+ users
Creating your organizational structure
Caller IDs
Address registry
Categories
Dictionary
File manager
Download Center
Your Account
Two-factor authentication (2FA)
Configuration
Persons & Groups
Alarm configuration
Alarms
Launch Forms - Configuration
Message templates
Calendar
Location profiles
Geolocation profiles
Whitelists
Jobs
Events
Telephone quickstarts
Survey
Alarm Templates
Alarm Flow
Interfaces
Operating Cockpit
Alarm Cockpit
Activate and stop alarm
Launch Forms - Trigger
Ad hoc alarm
Alarm monitor
Chat
Phone Conference
Video Conference
Surveys
Reports & Statistics
Loneworking
FACT24 Mediagateway
Microsoft Teams Bot
Web login for persons
Add-on modules
FACT24 ENS+ Incident Management
Telekom Settings Cloud of Things Narrow Band Interface
FACT24 ENS+ External API (REST) – Functionality Scope
FACT24 AI
Migration to ENS+
FACT24 CIM
Release Notes
New functions through FACT24 CIM release V.27.01
New functions through FACT24 CIM release V.26.01
New functions through FACT24 CIM release V.25.03
New functions through FACT24 CIM release V.25.02.01
New functions through FACT24 CIM release V.25.02
New functions through FACT24 CIM release V.25.01
New functions through FACT24 CIM release V.24.03
New functions through FACT24 CIM release V.24.02
New functions through FACT24 CIM release V.24.01
New functions through FACT24 CIM release V.23.02
New functions through FACT24 CIM release V.23.01
Getting started
FACT24 CIM starter - crucial steps
FACT24 CIM essential
FACT24 CIM advanced
Introduction
Start Page
Admin workspace
The FACT24 CIM Roles
Navigation
Search
Levels
Contacts
Locations
Working with incidents and alarms
Tasks and Action Cards
Chat (previously Case Manager)
Task Manager
Action Cards
Functions of Action Cards
Pre-defined Action Cards
Logs
Reports and Statistics
Templates
Risk Analysis
Mobile App (FACT24 ENS+ and CIM)
App Releases
App-Version 3.28
App Version 3.26
App Version 3.24
App Version 3.22
App Version 3.21
App Version 3.20
App Version 3.17
App Version 3.16
App Version 3.15
App Version 3.13
App Version 3.12
App Version 3.10
App Version 3.9
App Version 3.8
App Version 3.7
App Version 3.5
App Version 3.3
App Version 3.2
Download & Basics
FACT24 ENS+ App Section
Basics and Login
General Settings
Account
Location Services
Group Management
Triggering Alarms
Editing Alarms
Active Alarms
Chat in the ENS+ Application
History
Reports
Emergency Plans
Lone Worker Protection
Special Smartphones
FACT24 CIM App Section
Support
Table of Contents
Calendar
With adding a calendar or a duty roster as part of the alarm configuration, you can define time-based deviations from the default alarm settings. When the alarm is launched at a time that falls into a selected Annual or Week calendar, it will either jump to an alternative alarm or alert an alternative group. If you add a Duty roster to an alarm, persons as assigned to their shifts will be alerted.
The following general information on the calendar concept should be noted:
→ Annal calendars, Week calendars, and Duty rosters can be assigned to several alarms.
→ Several annual and week calendars can be assigned to one alarm.
→ Only one duty roster can be assigned to an alarm.
Calendars can be assigned to an organizational unit or are available to all users as a global entry. In addition, they can go beyond 24 o'clock (beginning: 17:00 end: 06:00 o'clock). In the tool there are three different calendars which can be stored - Annual calendar, Week calendar, and Duty rosters.
Week calendar
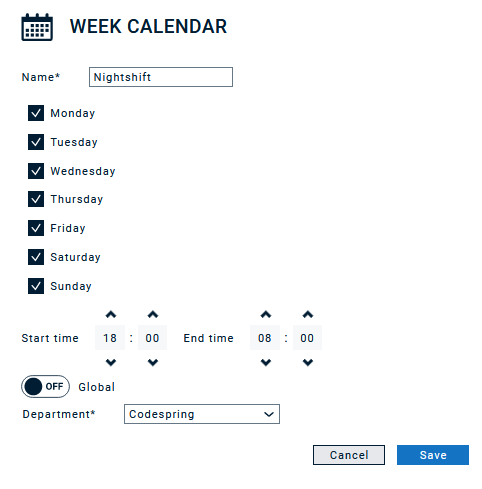
- Name: A unique name must be assigned to the Week calendar. Here it is recommended to use a meaningful name, so that with the later selection of the calendar it is clear, which calendar it concerns.
- Weekdays: Weekdays can be selected on which the subsequent time slot is to be valid. Days/times that are not selected are processed (if no other calendar plan is active) with the groups/processes set by default in the alarm.
- Start time and end time: Start and End selects the time for which the calendar plan is valid. The time can be selected for all days (e.g., start: 17:00 end: 06:00).
- Global: With the global switch, the calendar plan can be made available to all organizational units at «On». The selection of the organizational unit is then hidden. The option for a global calendar entry is only available to a root user.
- Organizational unit: If the calendar plan has not been marked as «Global», the selection of the organizational unit is available. The calendar plan is then only available within the selected organizational unit.
Annual calendar
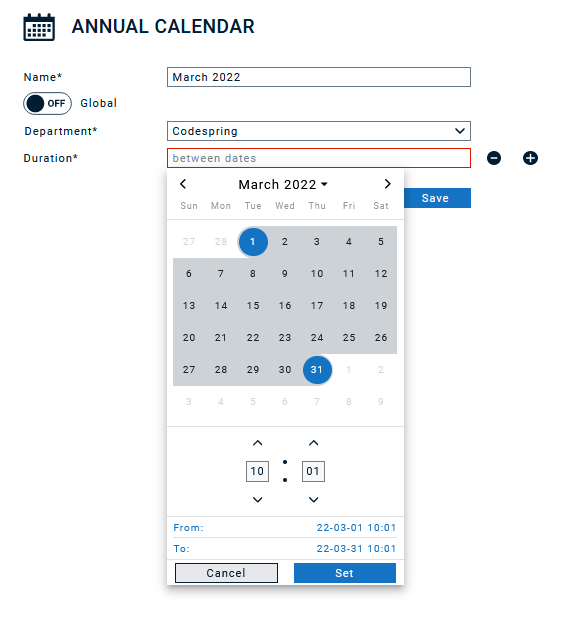
- Name: A unique name must be assigned to the annual calendar. Here it is recommended to use a meaningful name, so that with the later selection of the calendar it is clear, which calendar it concerns.
- Global: With the global switch, the calendar plan can be made available to all organizational units at «On». The selection of the organizational unit is then hidden. The option for a global calendar entry is only available to a root user.
- Organizational unit: If the calendar plan has not been marked as «Global», the selection of the organizational unit is available. The calendar plan is then only available within the selected organizational unit.
- Duration: The annual calendar can be divided into up to 26 time periods. A new section is added with «+» or removed with «-». The period can be configured by selecting the start and end points. The time is used for both points and can be configured separately for start and end point. For this purpose, the time must be adjusted after the respective selection of the day.
You can also export and import Annual calendars.
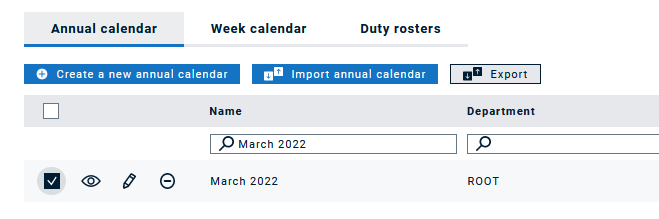
For the export you can choose between csv and ics format. The ics file can be added to your own calendar easily.
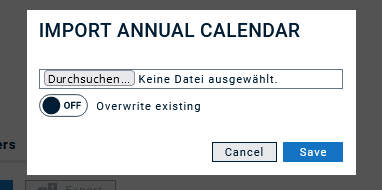
For the import you should use a csv file in the same as the export format:

If you choose to import a calendar, you have the option to overwrite an existing calendar with the same name.
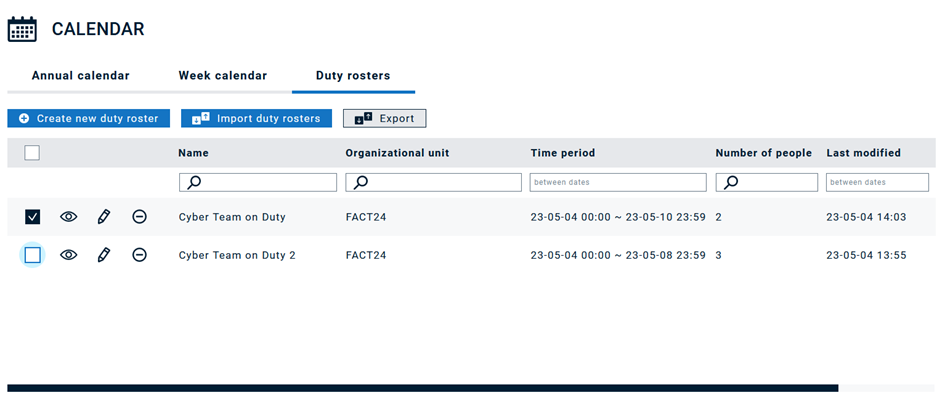
Duty roster
With a duty roster you can organize persons in shifts. As a first step, you have to define a name and select the channels, which shall be used to notify persons (similarly to when you assign persons to groups or to alarms).
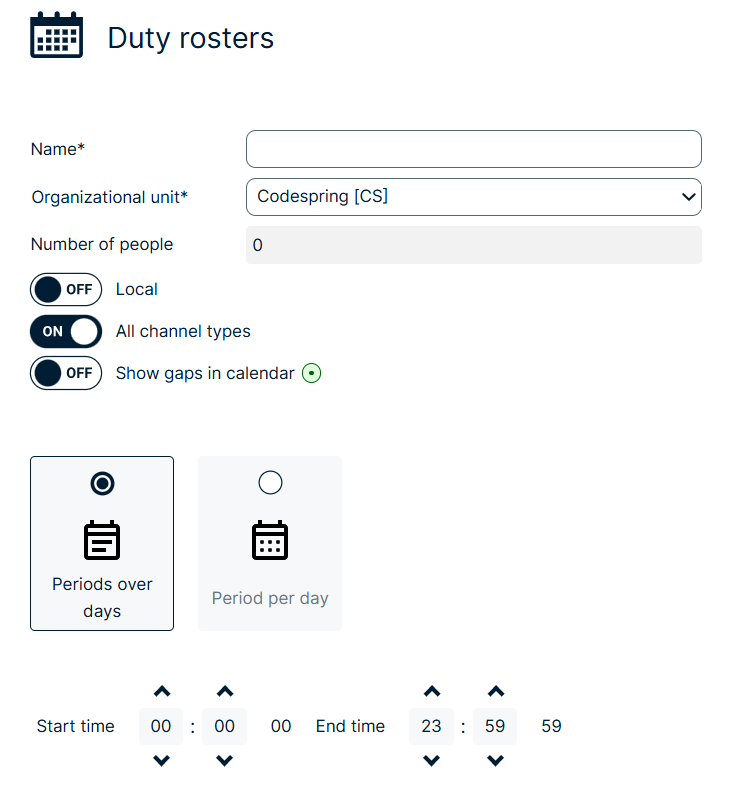
The gap checker function assists you in identifying any unassigned or vacant slots in duty rosters, reducing the risk of scheduling errors.
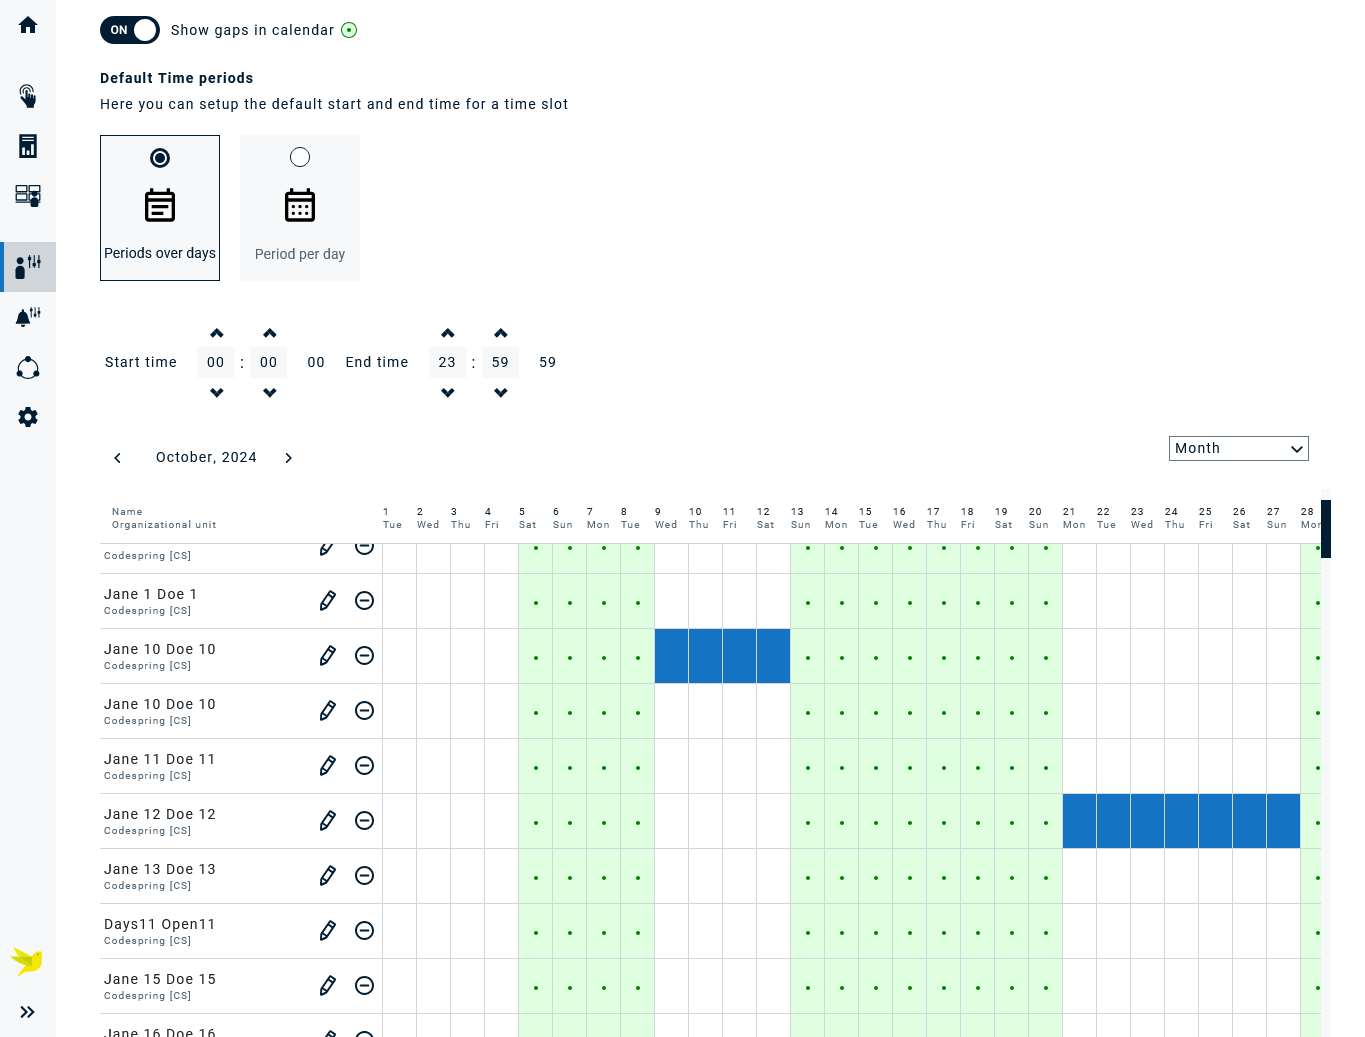
Under “Default time periods”, you can set the standard start and end time for a time slot.
Duty Rosters also support shifts that cross midnight.
You simply enter the start and end time (e.g. 18:00–06:00), and the system automatically understands that the shift continues into the next day.
This works for all typical night or extended shifts (e.g. 12-hour security or operations shifts).
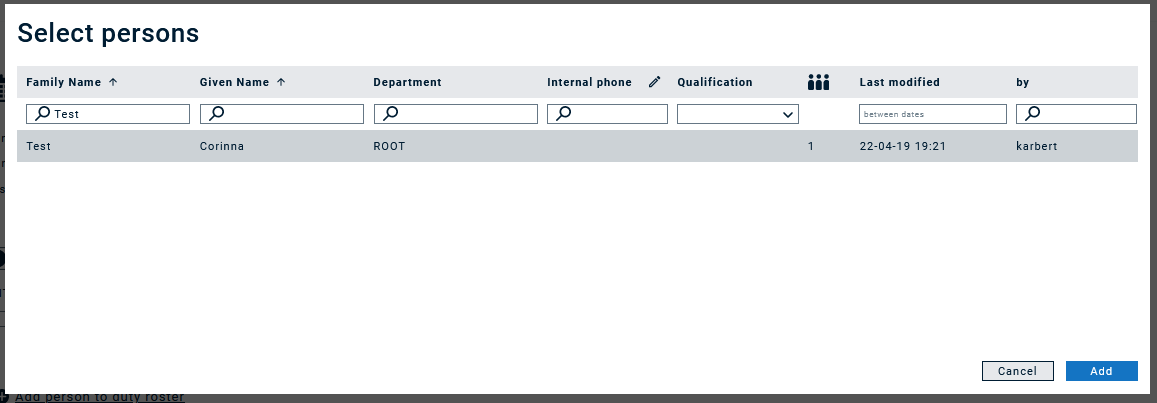
Once you click "Save", you will see the option to add persons to the duty roster. You can filter for various fields to find the persons you would like to add.

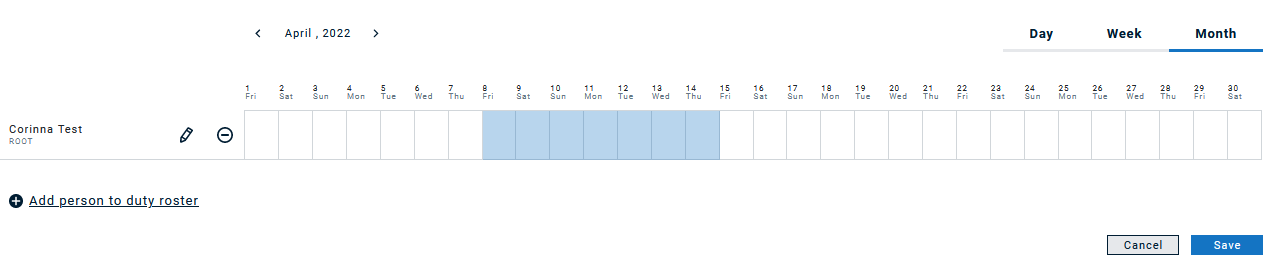
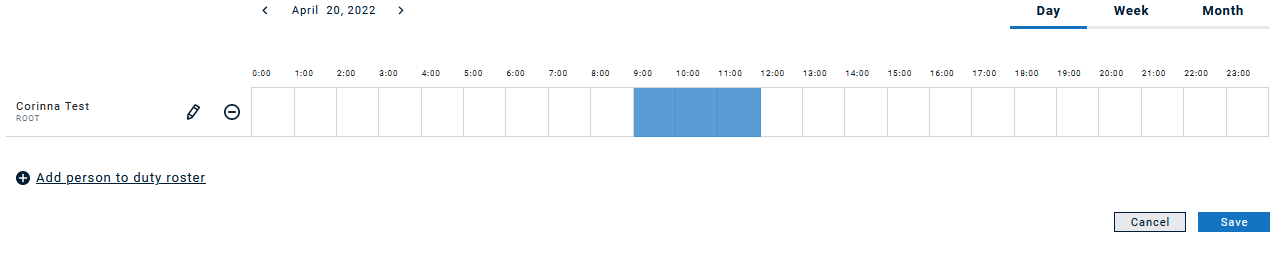
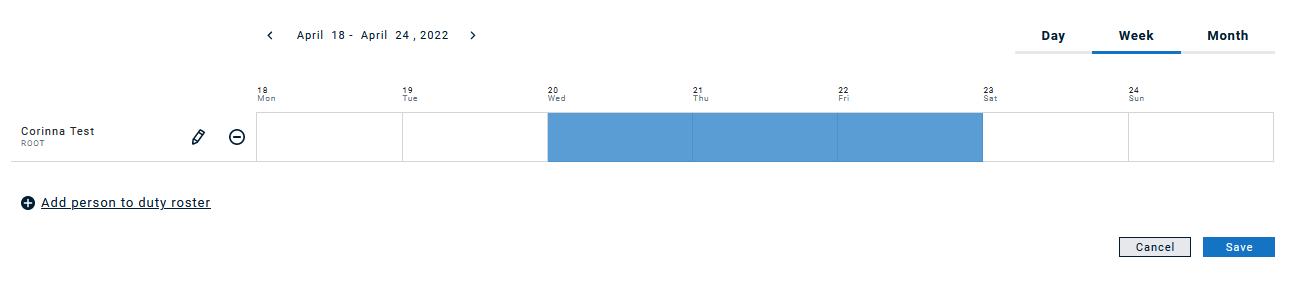
Once a person is added to the roster, you can define the time frames in which this person is "on duty", either by clicking into the calendar directly or seleting the pen icon. When you click into the calendar directly and have selected the month view, you select full days by default, which you can then adapt via the pen icon. With this, the definition of time periods is the same as in Calendars.
If you select Day or Week, the scale of the calendar will adapt accordingly:
Managing Duty rosters via exports and imports
Use csv/xlsx exports and imports to manage duty rosters more easily, particularly when it comes to a large amount of persons.
We recommend to always start with one duty roster, which is manually created, and then export it as csv/xlsx to have the correct structure. It is important that all persons you would like to import have an employee ID, and all persons in one duty roster have the same channels assigned.
Sample export of a duty roster where all channels are selected.

Sample export of a duty roster where only Mobile and SMS channels are selected.

When importing a file, you have the following options:
- Create / Add a new duty roster altogether
- Update an existing duty roster
- Add additional time frames for existing persons
- Overwrite time frames with new ones for existing persons
- Add additional persons to existing persons
- Overwrite existing persons in a duty roster, i.e., delete persons that are not existent in the import file and add new persons
- Note that it is not possible to delete a duty roster via import.
Let’s go through step by step:
We start with this duty roster setting. | 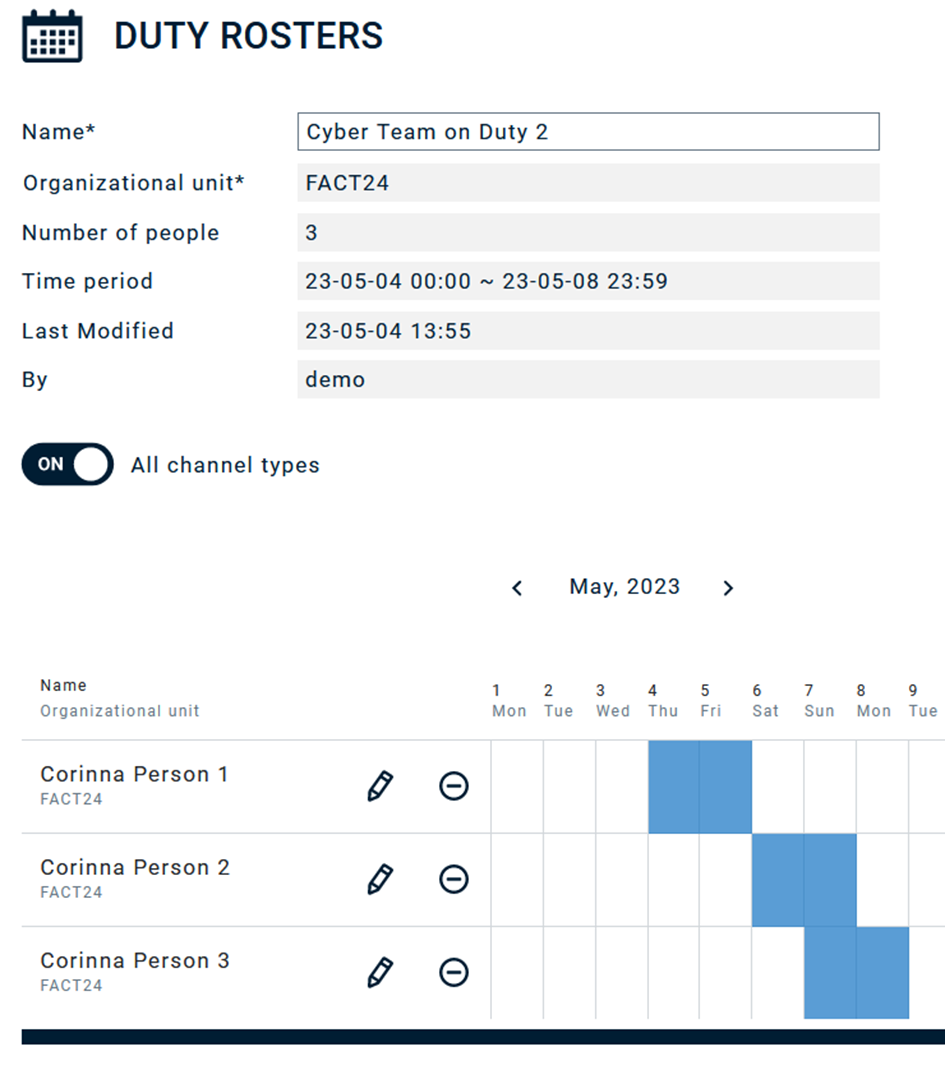 |
If we export this duty roster, the csv has this file structure. |  |
Now we change the time slot for person 3 but don’t overwrite anything |  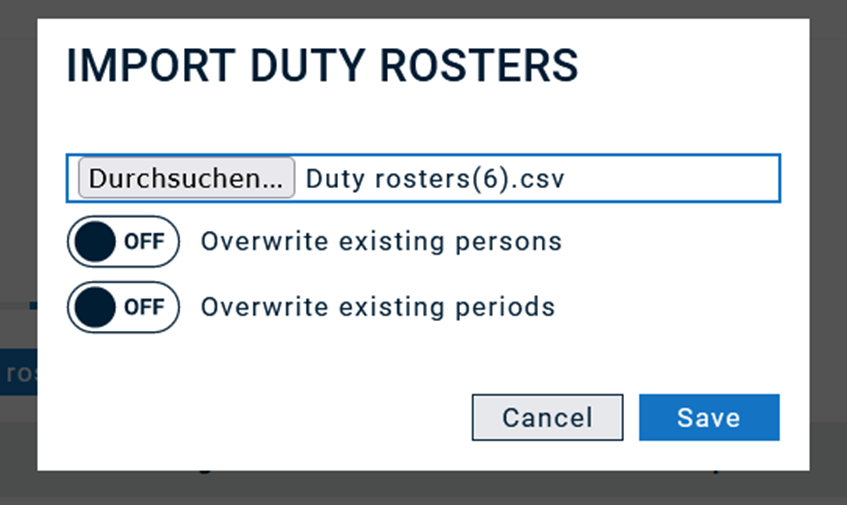 |
Result: The new time frame was added | 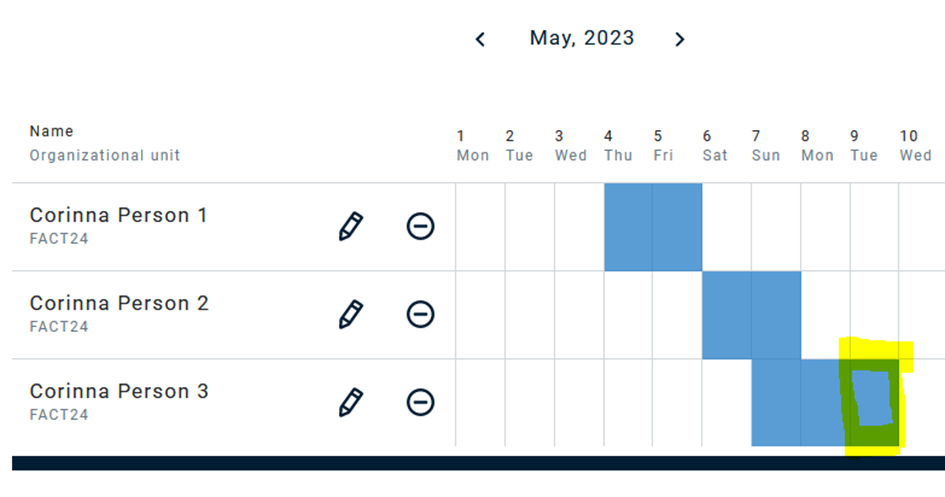 |
Now we use the same import file and select “overwrite existing periods”. | 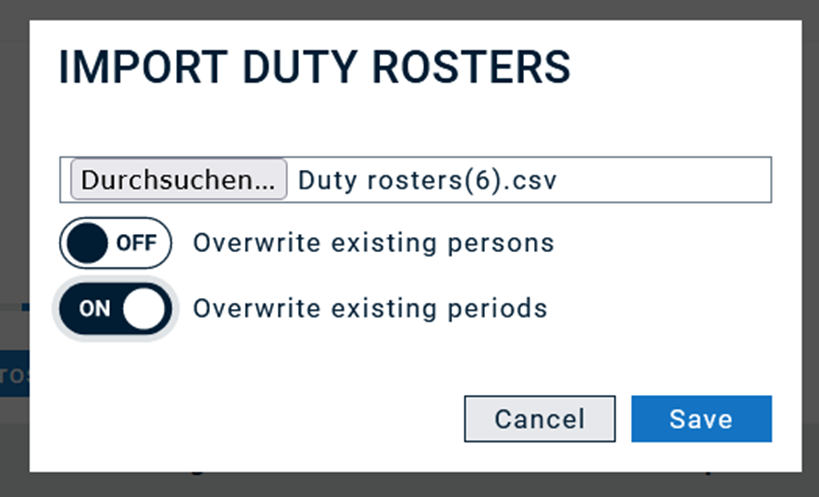 |
Now the time frame was adapted – the slot no longer present in the calendar was removed. | 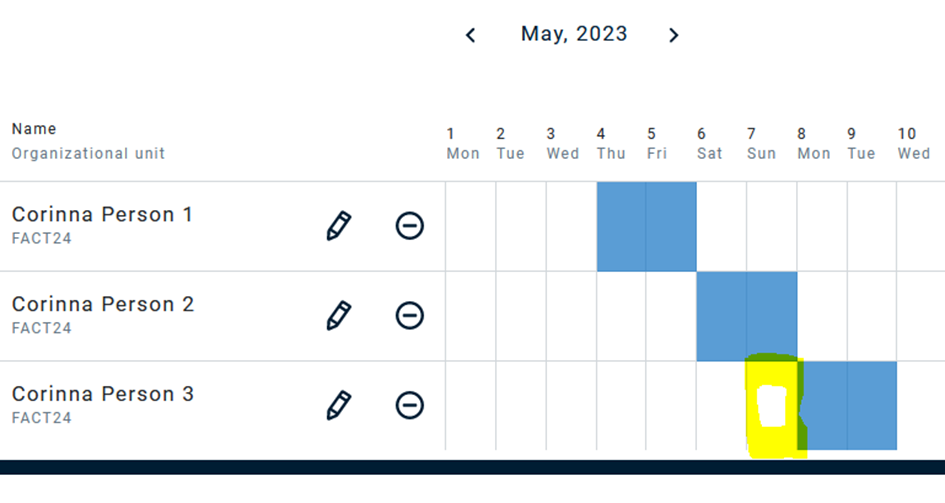 |
Now we remove Person 3 manually from the duty roster, and remove person 1 from the import file. |  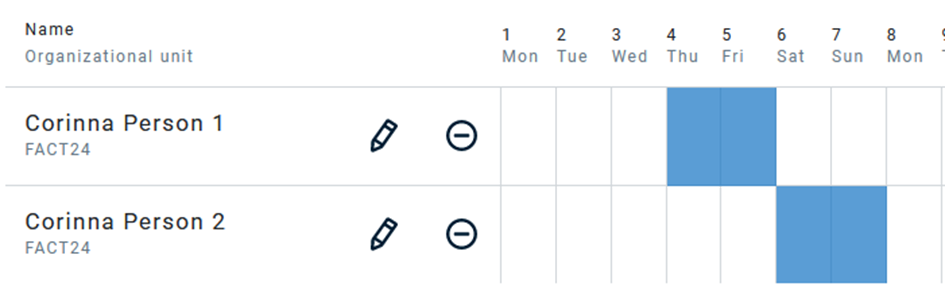 |
First, we import with overwrite “off”: | 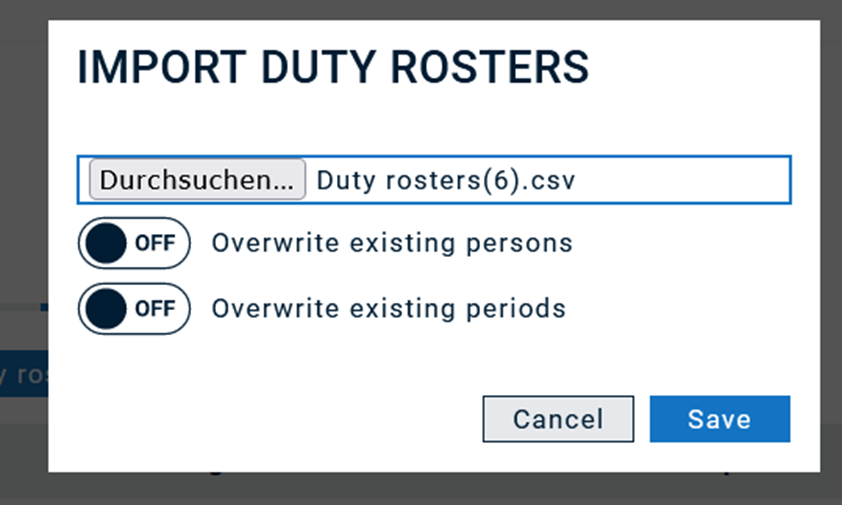 |
Result: Person 3 is added, Person 1 is still there. | 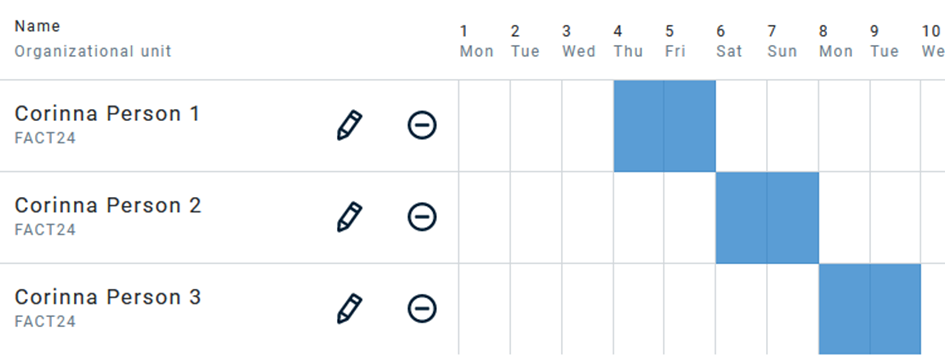 |
Same source file but overwrite on. | 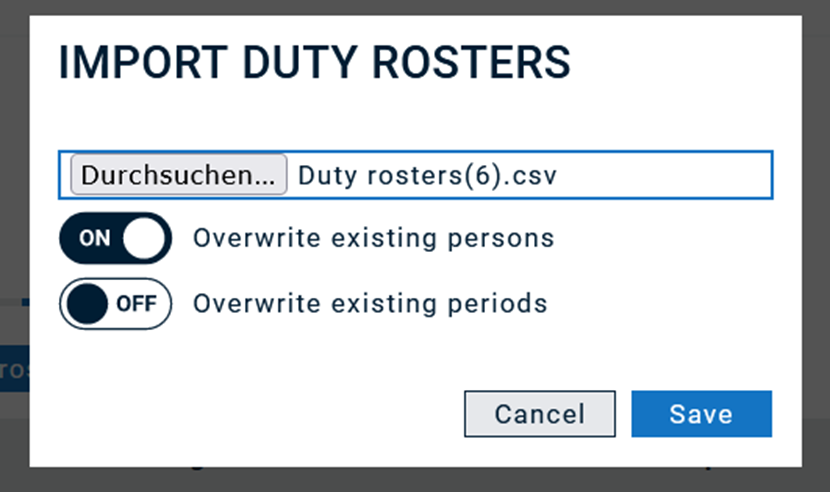 |
Result: Person 1 is deleted. | 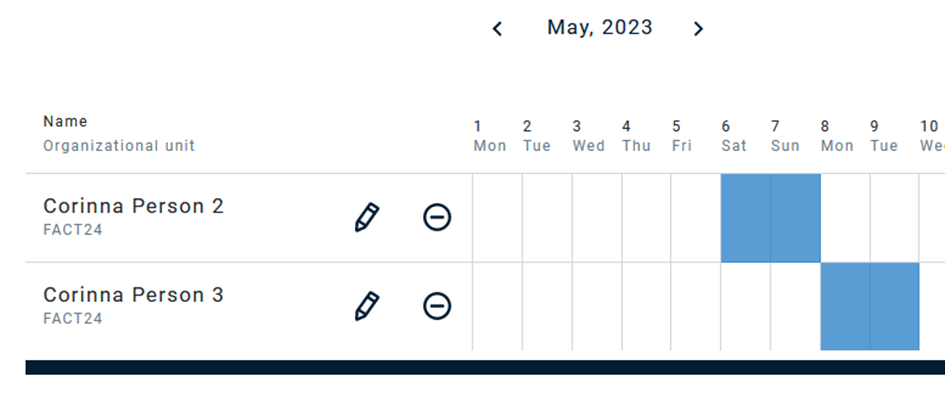 |
Adding a new duty roster: simply adding new rows with a new duty roster name to the import file |   |