Please note that visibility of this functionality depends on your product edition.
The Incident Board enables the central recording and processing of incidents with the possibility of distributing tasks and recording information, decisions and the logging of all processes.
→ An incident can contain several tasks, information, and decisions.
→ An incident can be assigned to several organizational units („+“).
→ An incident can be processed by several teams of different hierarchical levels.
→ Every change within an incident is stored in the system. This is done by means of independent versions of the information, decisions and tasks and the creation of system information in the case of general information about the incident.
Important note on the topicality and the change of contact data: When inserting per-sonal data from the master data directory in an Incident, a duplicate of a person is created at the time of the import. Thus, no updates of the personal data within the Incident will be carried out if there is a modification within the master data. This en-sures that the documentation of the entire Incident cannot be manipulated by changes in the configuration area.
Overview
The overview shows the user all incidents that are relevant for him.
An Incident can be viewed or edited by a user, if the user has either created an Inci-dent independently or is a member of a team that has been assigned to an incident.
A multiple filter can be applied to the fields «Status», «Name», «Location», «Cate-gory» and «Start and End Date». The «Eyes» icon allows you to read an incident. The incident can be edited via the «Pen-Icon». Users who only have an auditor role can only read an incident.
There are two different status an incident can have:
In progress
The incident is currently open and can be processed by the creator as by the assigned incident teams.
Closed
Once an incident is completed, it cannot be processed. If processing is necessary, the incident must be opened again.
Only Principal Users can delete completed incidents.
In the lower area the user finds the tasks assigned to him. These tasks can be from different incidents. If a completion time is exceeded within a task, the incident is highlighted with a red background color. The user can directly edit the task by click-ing on the «Pen-Icon».
Incident details
Within an Incident there are five sub-areas:
Documentation
In this area, tasks, information, decisions, and system infor-mation about an incident are managed, continued and documented. The export of an Incident can also take place within this area.
Alarms
This area is used to trigger alarm scenarios.
Messenger
Using this function, ad-hoc messages can be sent to contacts of an incident.
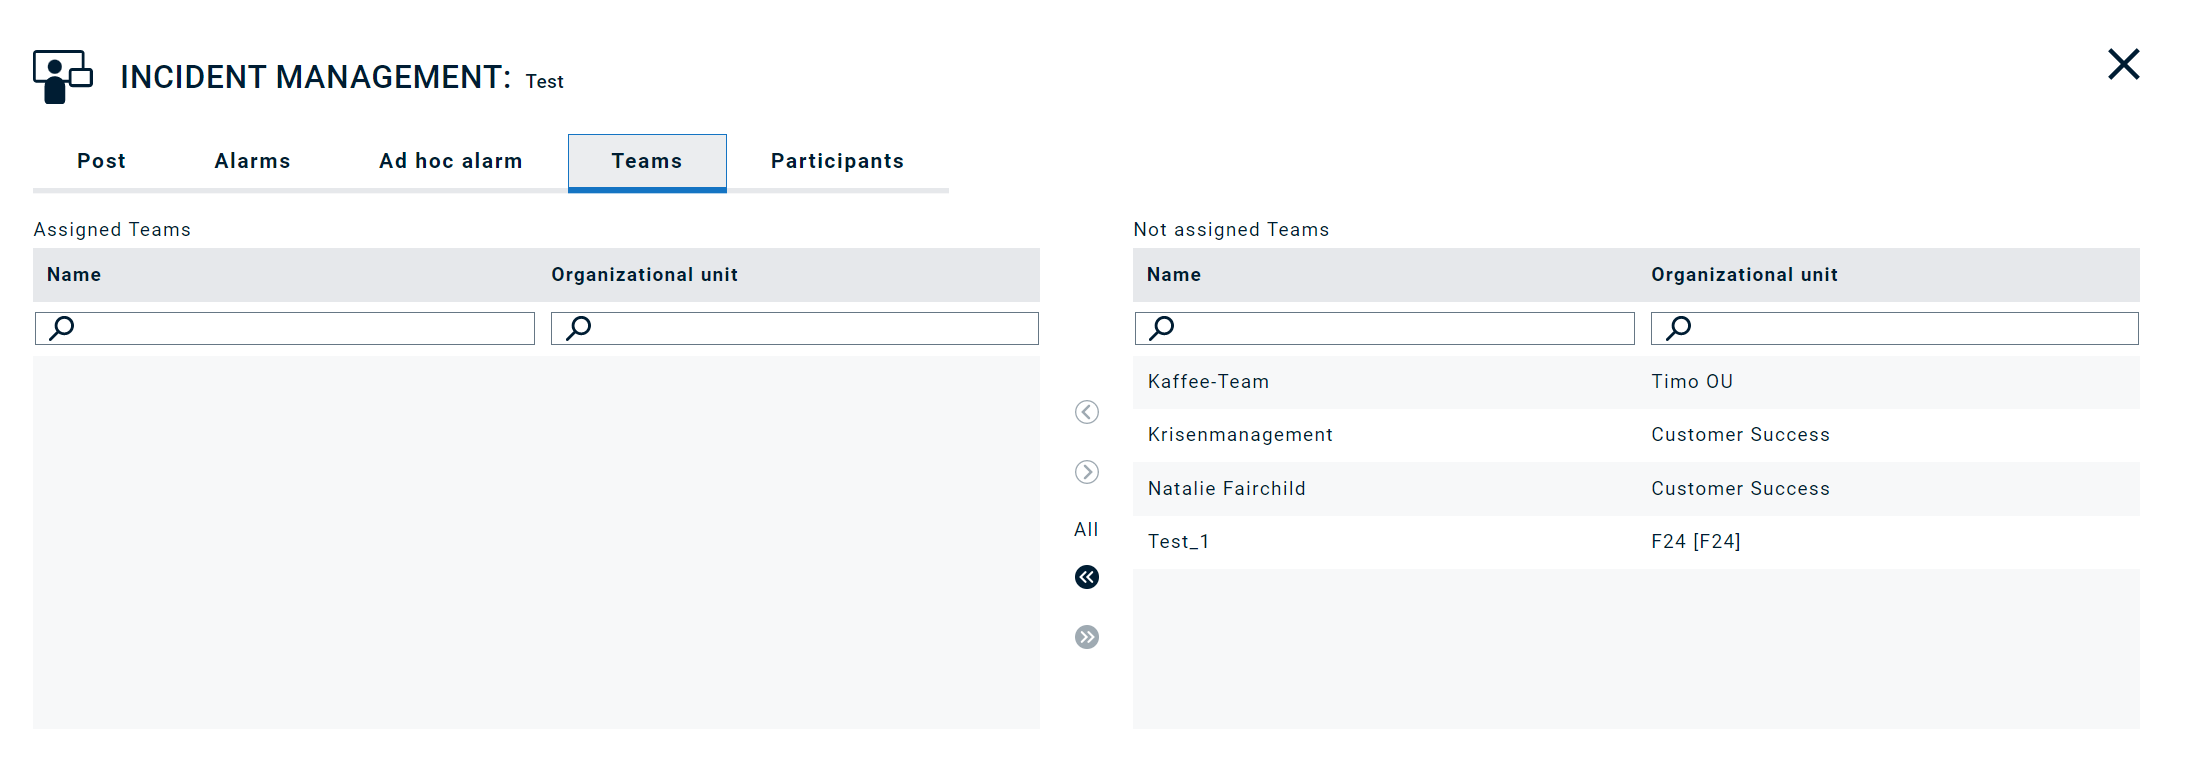
Teams
Teams can be assigned to an Incident via this subpage. Only activated teams can process an Incident.
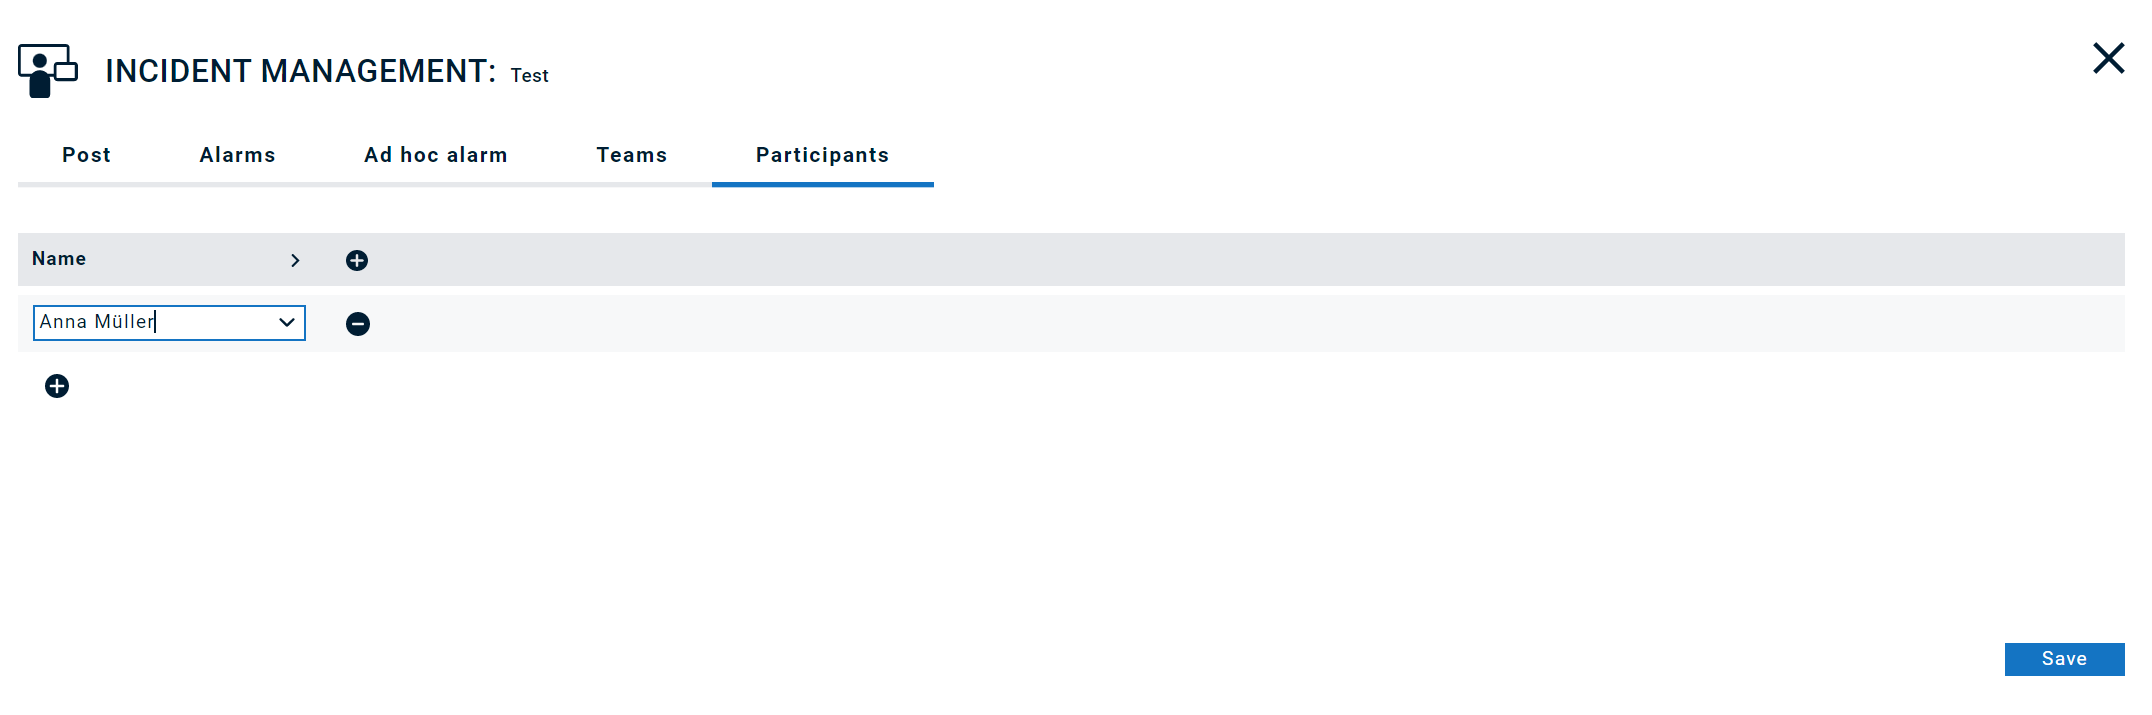
Participants
This menu item allows the manual entry of persons who have participated within defined crisis teams or telephone conferences.
Documentation
The documentation contains four sub-sections, these are «General information», «Assignment of task lists», «Fast entry» and "Entries». The solution also supports four types of entries:
Tasks
Tasks can be given to members of the assigned teams for pro-cessing.
There are four different status types within an Incident:
- Unopened - A task has been loaded from a to-do list. In this case the status of the task is unopened by default.
- In process - The task is being processed.
- Completed - The task has been completed.
- Closed unopened - The incident has been closed. At the time of completion, the task had the status «Unopened», in which case the status is set to «Closed Unopened».
Information
Information is entered manually using fast entry. Information cannot be loaded using a task list. An information has only one status, this is «Completed».
Decisions
Decisions are entered manually using fast entry. Resolutions cannot be loaded using a task list. A resolution has only one status, this is «Completed».
System information
System information is automatically created by the system and is used to log an incident. It cannot be edited in comparison to the re-maining entries. A system information has only one status, this is «Completed».
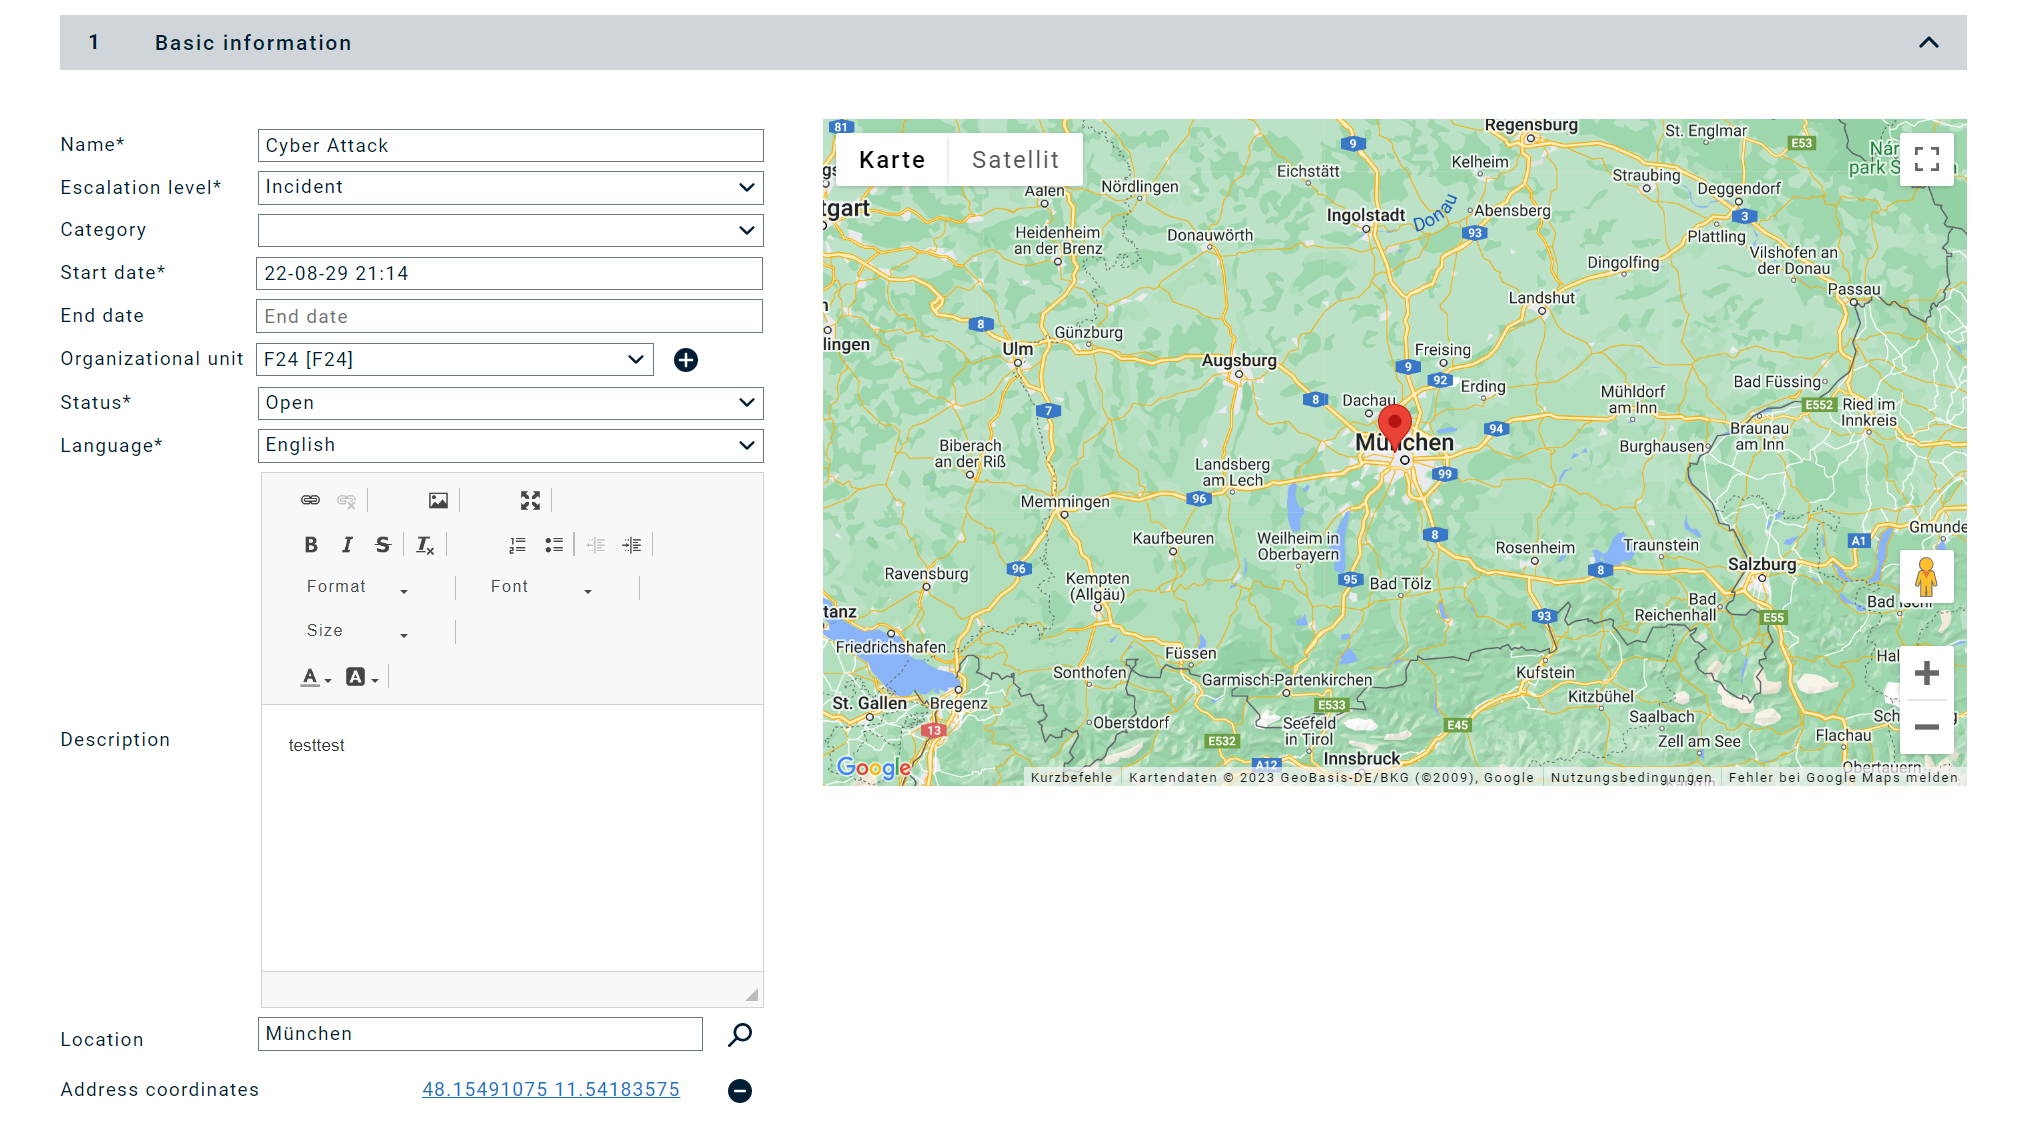
General information
Name: This is used to record the name of an Incident.
Escalation level: Here the importance of an incident can be defined and thus also the desired archiv-ing of a process. There are four levels to choose from, these are «Incident», «Critical Incident», «Emergency» and «Crisis».
Category: A category can be assigned to each incident. This is used to group incidents of the same type and is relevant for statistical evaluation
Start date: The start time of an Incident is defined here. By default, the current system time is used. This time can be manually overwritten by the user, for example, if the incident took place at an earlier time and is entered later. The actual system time is stored as system information under the entries.
End date: The end date of an incident is defined here. By default, the current system time is used. This time can be manually overwritten by the user, for example, if the incident was completed at an earlier time.The actual system time is stored as system information under the entries.
Organizational unit: The organizational units affected by an incident can be defined here.
Status: An incident can be closed or reopened here. Please note that an Incident can only be closed if there is no task in progress. Please note that an Incident can only be closed if there is no task in progress. When archiving incidents, please note that the stor-age period of 2 or 10 years begins after the status is set to «closed». Important - here the system time of the closure is considered and not the possibly deviating en-tered time. If an Incident is reopened and then closed again, the archiving of the data starts from the system time of the last closure of an Incident. Thus, the archiving period is extended by the reopening and closing of an Incident.
Language: By default, this is the system language of the user or the currently selected language. The system information is displayed in the corresponding language.
Description: This field allows a detailed description of the Incident.
Location: The location of the incident can be entered here.
Assignment of tasklists
Within this area, previously defined tasklists for an incident can be loaded. You can search for a task list by name or by keywords.
After the tasklist has been loaded, the tasks are saved directly under the fourth item «Entries».
A team member always sees only the available tasklist of his organizational unit. If several teams are working on an incident, the respective teams can assign to-do lists from their organizational unit to an incident. After assigning the list, the tasks can be edited by all assigned teams, independent of the organizational unit.
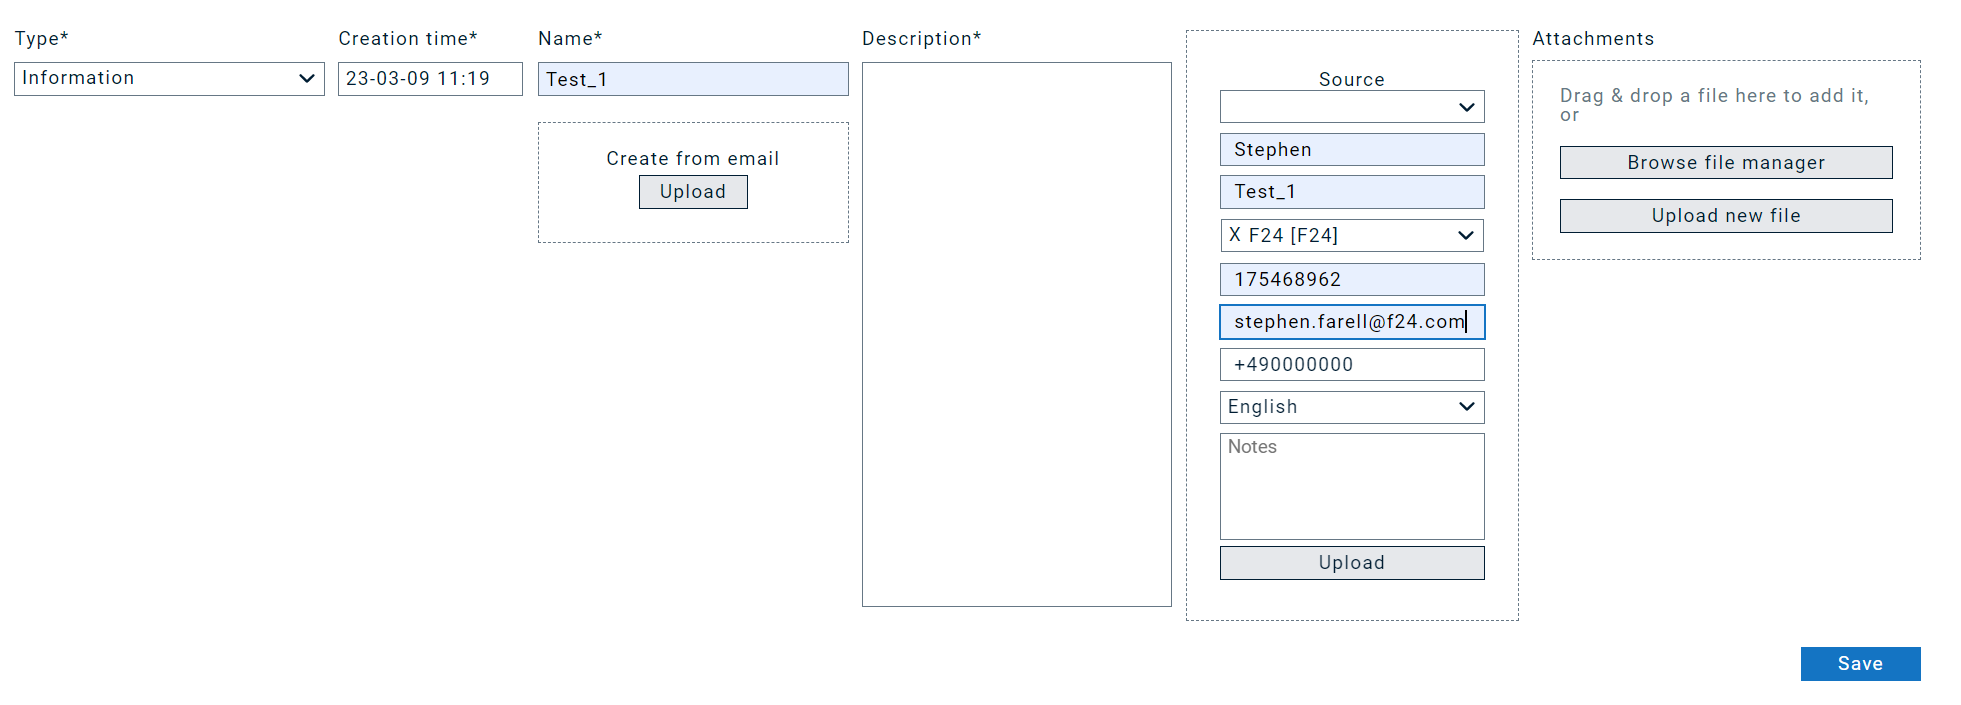
Quick input
In this area the user has the possibility to enter information, decisions, and tasks manually. All entries have the following fields:
Type: The type of entry is selected here.
Creation time: This is where the creation time of the entry is defined. By default, the current system time is used. This time can be manually overwritten by the user. The time of the last change is entered directly under the entry. The name of the user who made the last change is also displayed.
Name: Here you can assign a name for the entry.
Quick entry e-mail: The user can drag and drop a mail into the field. The system automatically copies the text for the field «Name» from the subject line. The e-mail is also saved as an attachment.
Description: Here you can enter a description of the entry.
Source: At this point, the source of the entry can be entered. All persons who were recorded within the Incident are available here. In addition, a person can be created manually or automatically imported via vCard Import using the drag and drop function. The formats «.vcard» and «.vcf» are supported. By default, the user who creates the entry in the system is selected.
Appendix: The user can assign attachments to the entry using the drag and drop function. The maximum file size per attachment is 10 MB. Up to 10 attachments can be saved to an entry.
Save: This button is used to save an entry in the system. The entry is automatically saved under the item «Entries». When a task is saved, the status of the task is set directly to Edit.
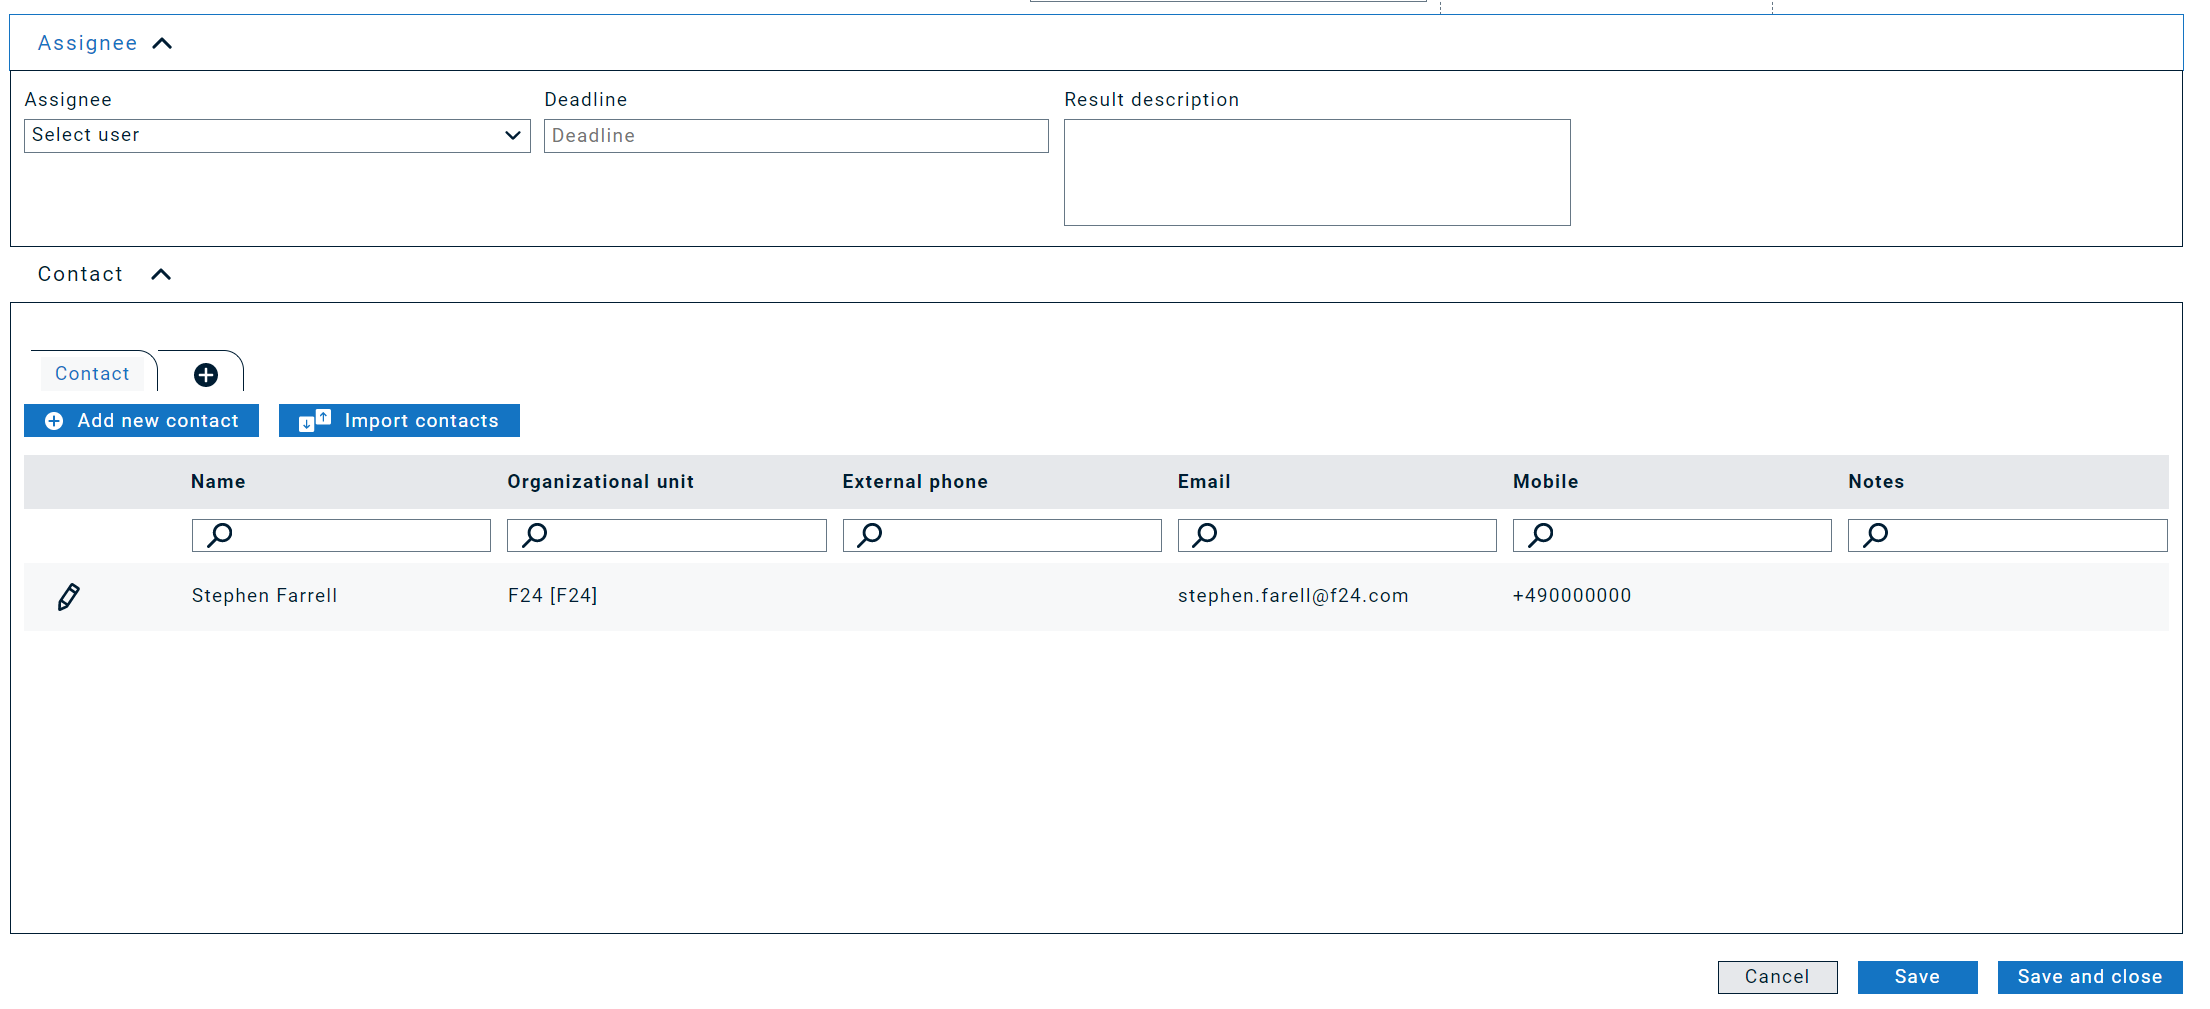
The quick entry «Tasks» offers further fields for editing. In the «Assignee» area, you can specify a responsible person for a task. All users who have access rights to the dedicated incident are available for selection. The Incident can be viewed by the employee in the overview under his personal tasks. Furthermore, a completion date can be set for the task. In the «Contacts» area, contact persons for a task can be stored. All contacts availa-le in the system are available for selection. In addition, a person can be created manually or automatically imported via vCard Import using the drag and drop func-tion. The formats «.vcard» and «.vcf» are supported for this purpose. With the «Im-port Contacts» function it is possible to import the contacts via a CSV file.
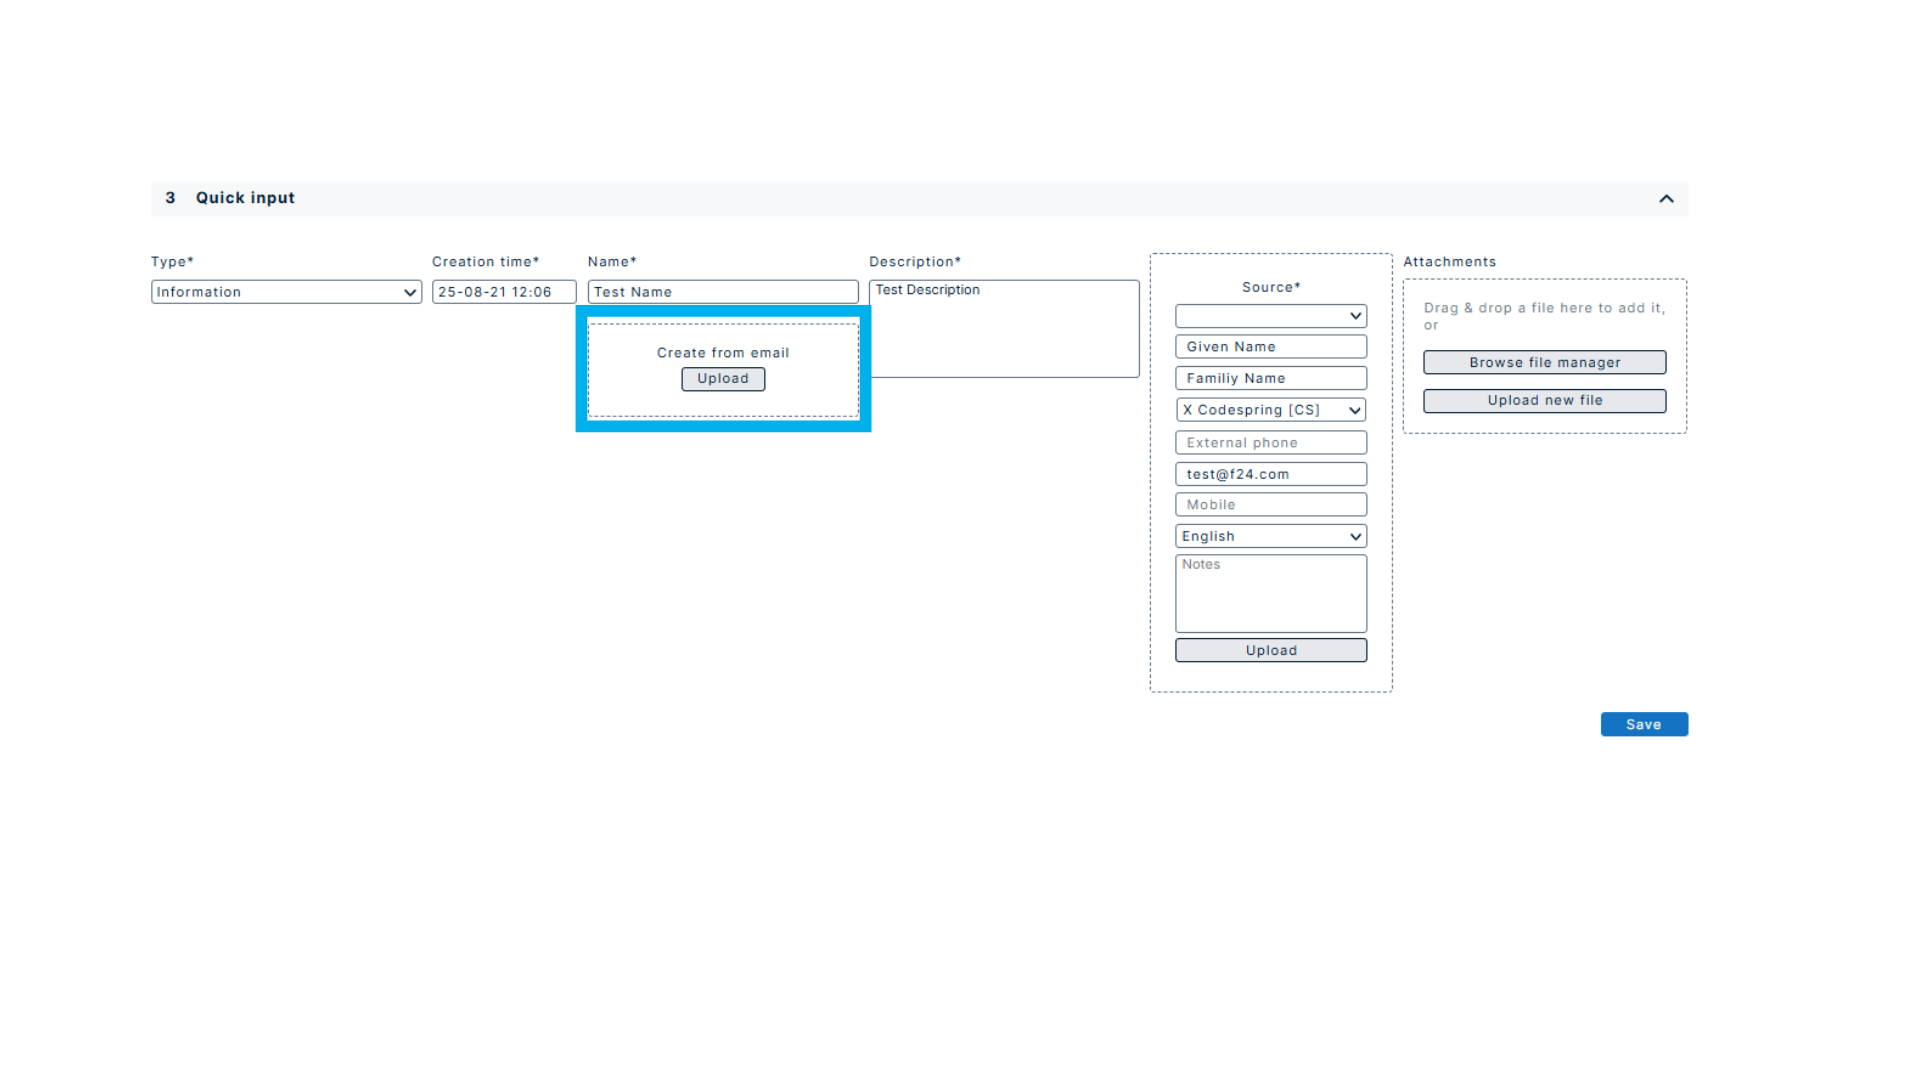
Quicker task creation from emails
You can also upload an email under 'Quick input'. In this case ENS+ reads the name and the description from the email. This has been extended and now if the email sender owns an email address for which we can find a person or user with that account email, then we fill out the 'source' parameters with the person's/user's data.
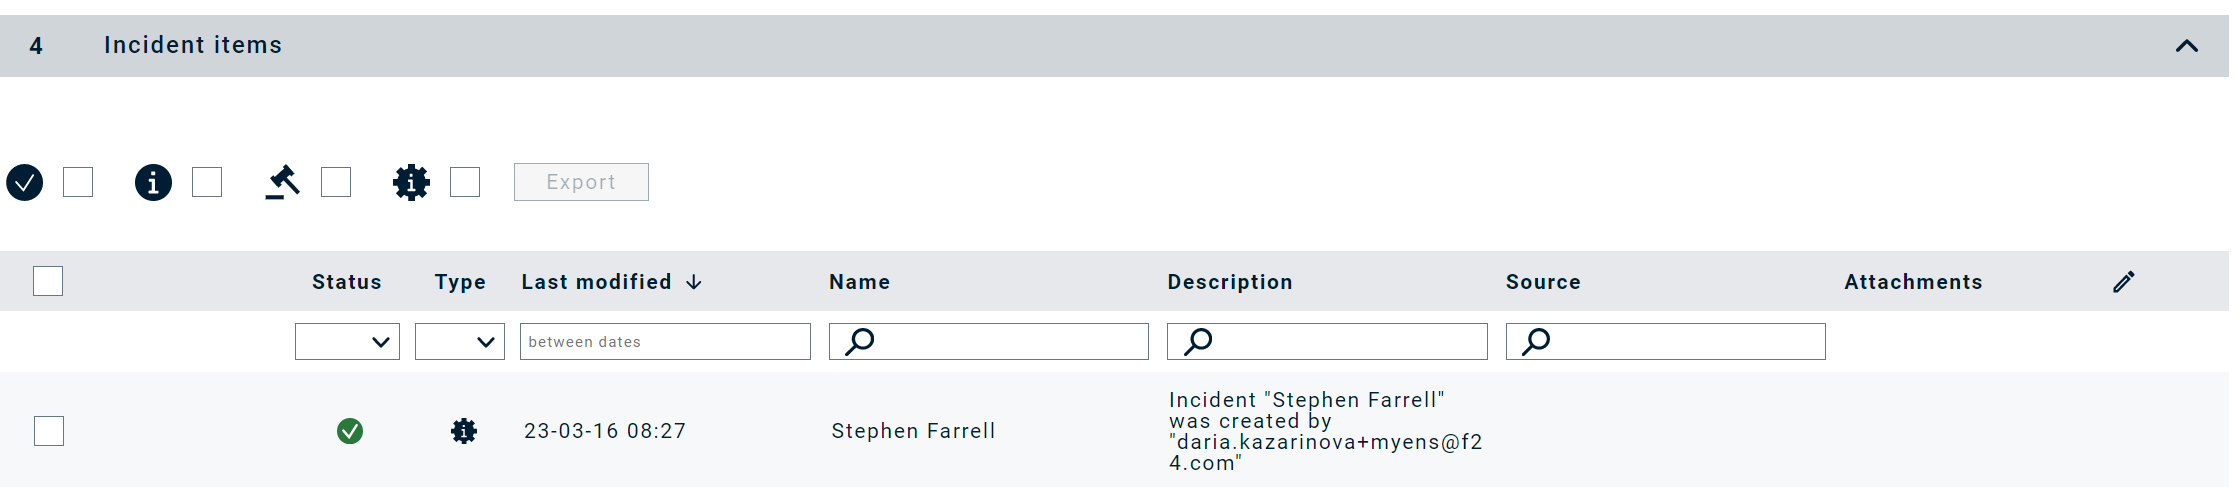
Incident Items
This area contains all processes within an Incident.
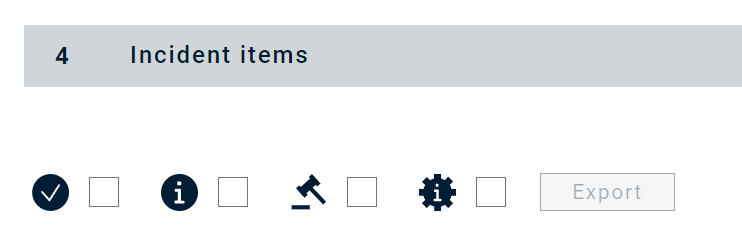
Export: In the upper area an automatic export of an incident can take place. The system generates a PDF document. It is possible to select which entries are to be imported. The different entry types are available. After selecting the desired entry types, a selective selection of the desired entries can be made. To directly select all entries for export, the option «Select all» is available. Alternatively, individual entries can also be selected. To select entries, a multiple filter can be applied to the fields «Status», «Type», «Last change», «Name», «Description» and «Source». A filter on the attachments is not available.
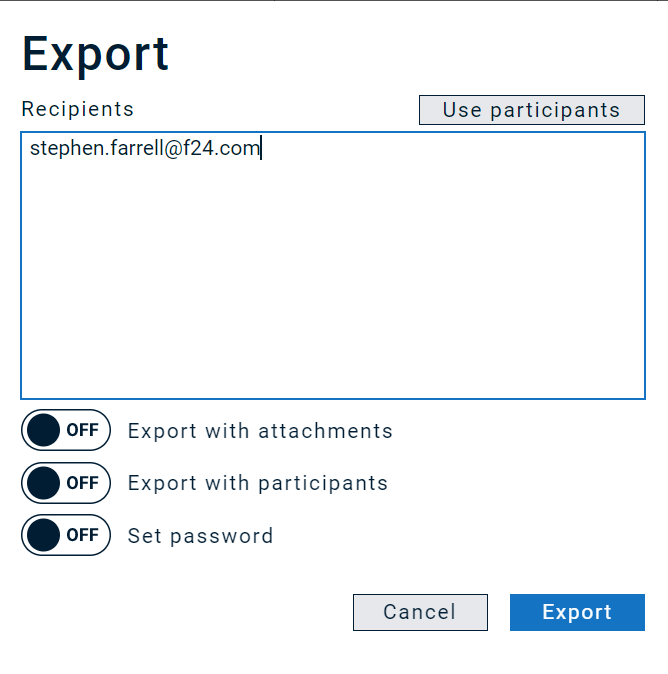
Important: For the export via the sorting function in the field «last change» you can define in which chronological order the data should be exported. If the desired entries are marked, the export process can be initiated by clicking on the «Export» button. In the next step, a window opens for selecting various options:
Recipients: Use participants
All e-mail addresses of the persons created in the Participants section are automati-cally transferred.
Recipients: Text field
By default, the e-mail address of the user who is performing the export is displayed first. If e-mail addresses of the participants have been added, these are also listed in the text field. The user can change or delete the address or add further addresses.
Export with attachments
By activating this function, links for download are created in the PDF export when exporting an incident.
Export with participants
The participant list is added to the report.
Set password
You can protect the report with a password.
Editing entries: Information, decisions, and tasks can be edited at any time. If a new version of an entry has been created, a new version number of the entry is created. If an entry has a version history, this is represented by the icon at the end. By clicking on the icon, older versions of an entry can be read
Detailed information on the various icons:
Pen-Icon
If an entry is opened with the pen, the entry can be edited. Entries can only be edited if an incident is in edit mode.
View-Icon
This icon is used to view the entry.
Alarm-Icon
This icon is only available for the «Task» entry. This icon symbolizes that alarms are assigned to the task. By clicking on it, you can directly access the page for triggering alarms.
Status types:
Blue circle with 3 white dots
Unopened - this status is given when a task is loaded directly from a task list in an Incident
Green circle with tick
Completed - this status indicates when a task has been completed. In addition, this is also the status for all other entries such as information, resolutions and system information. These have only this one status.
Circle with black lines
In process - this status is given when a task is in process.
Circle with black lines and X in the middle
Closed unopened - this status is given when an Inci-dent is closed with unopened tasks.
Last change: In the field «last change» you can select the period in which the last change was made to an Incident. The system time of the change is not considered here, but the time entered. This can differ from the system time. The changes of an entry are marked in colour.
Further fields: The fields «Name», «Description», «Source» and Annex are already explained in de-tail in the fast entry function. System information is used to document an incident and cannot be edited. The fol-lowing information is documented in a system information. ➔ Creation, modification, and deletion of general information about an Incident ➔ Adding and deleting teams ➔ Alarm reports, if an alarm was triggered within an incident or an ad-hoc report was triggered via the Messenger, the report is available one hour after an alarm has ended
Alarms
All alarms for triggering are located in this area. Via the «Task» filter, alarms associated with a task are displayed. If no filter is set, all available alarms for triggering are displayed to the user according to his authorization.
When an alarm is completed, system information is generated with the detailed alarm report.
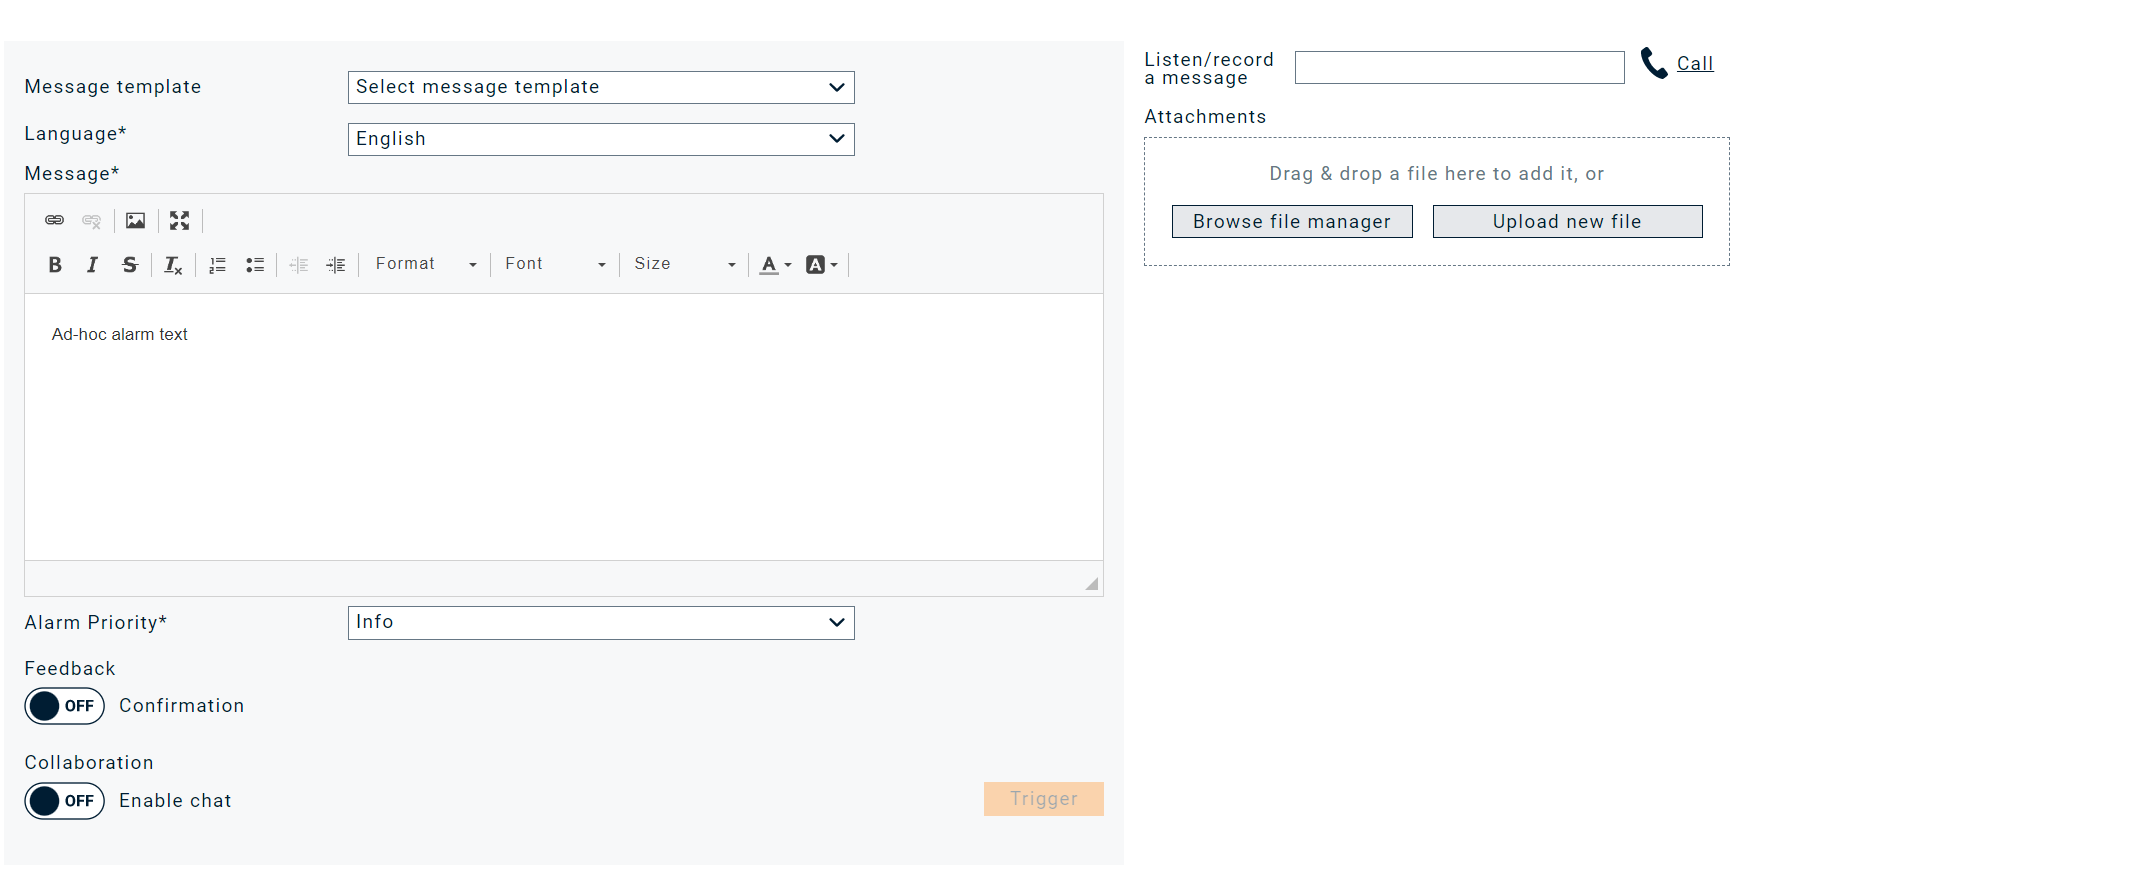
Messenger
The incident messenger work in exactly the same way as described in "Send notification". addition, the Incident Messenger offers the possibility of filtering persons and groups based on the entries made. Thus, ad-hoc messages can be sent quickly to contacts of a certain entry.
Teams
Teams can be assigned to an incident via this subpage. Only unlocked teams can edit an incident. As soon as a team is added or removed to an incident, the system automatically creates a system entry. Several teams can be created within one organizational unit.
Participants
This menu item allows the manual entry of persons who have participated within defined crisis teams or telephone conferences. Sessions can be created independently. In addition, you can manually mark who has participated in this session.
The participant list can also be accessed via the export in the documentation.